DEPRECATION NOTICE: The on-ramp codelabs are currently in the process of being deprecated in favor of content in the user manual. If anything seems out of date in this content, please refer to the user manual content on accessing the cluster.
- Establishing a VPN Connection
How to establish a secure connection to CRC resources via VPN - Access Modalities
Different ways to access compute resources and storage
The CRC computing and storage resources reside at the Pitt data center and are firewalled within PittNet. What this means is that you will need to establish a VPN in order to gain access.
Pitt offers two VPN tools:
Both software can be downloaded from software.pitt.edu.
The steps for setting up the VPN client are outlined below.
Global Protect
Download and run the Global Protect installer.
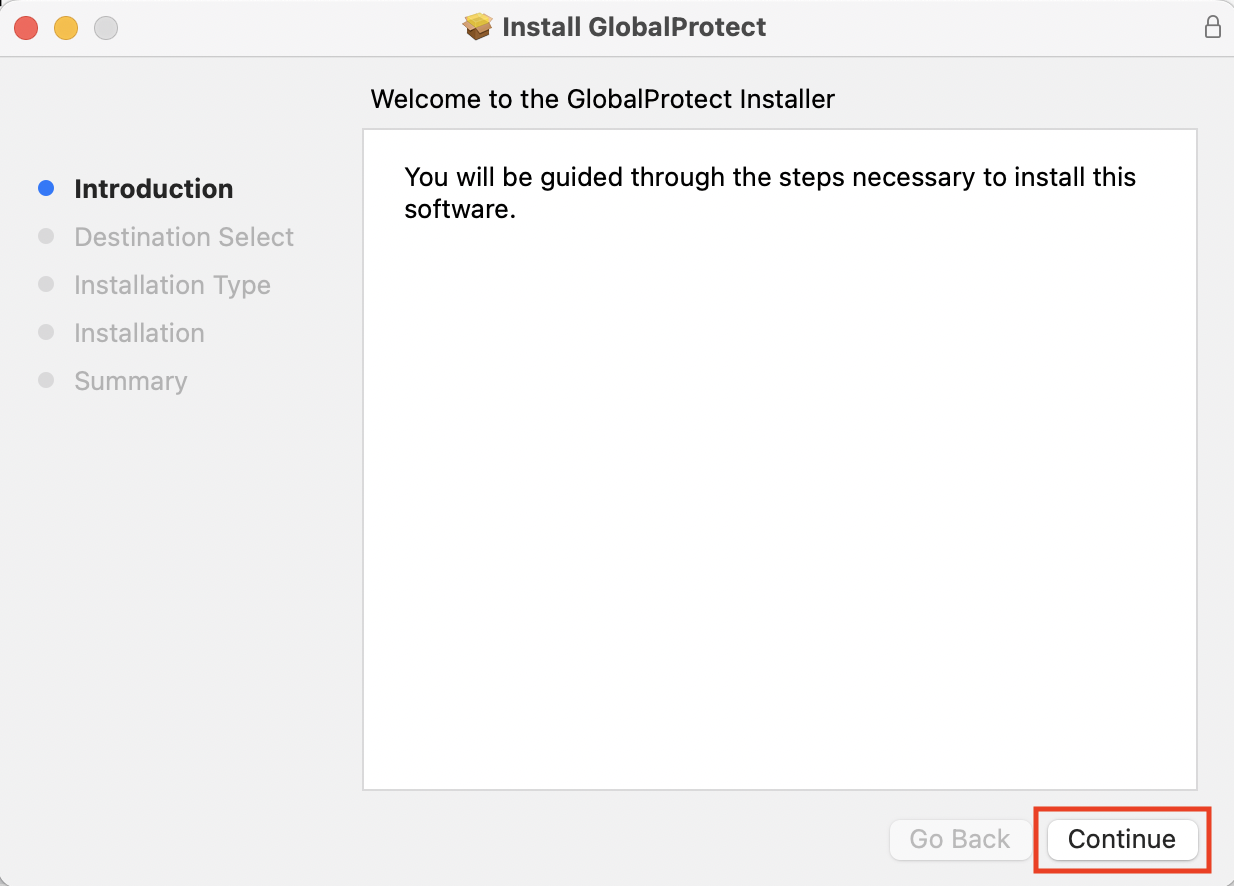
If presented with the option, make sure you have selected GlobalProtect System extensions.
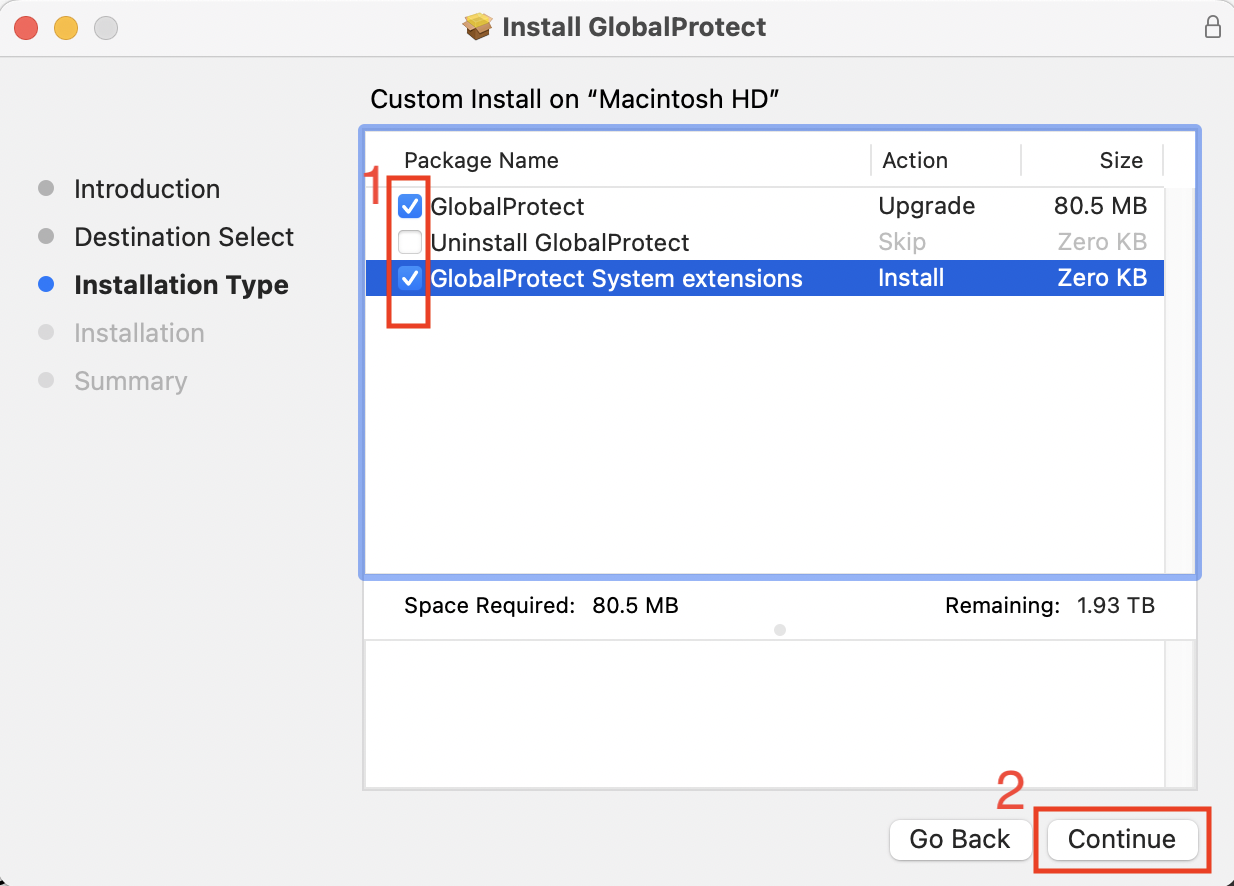
Click Install to start the installation. When this is done, macOS may block loading of the system extension
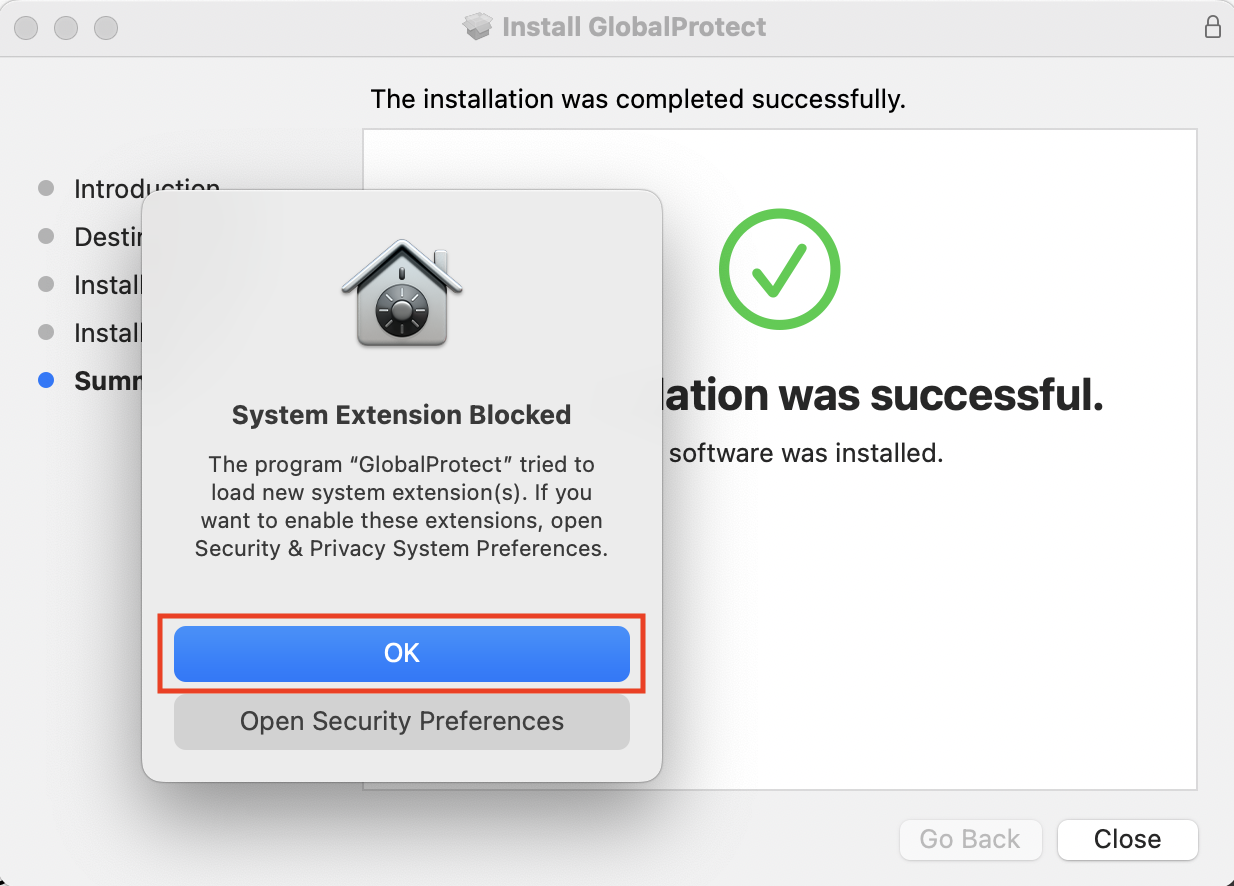
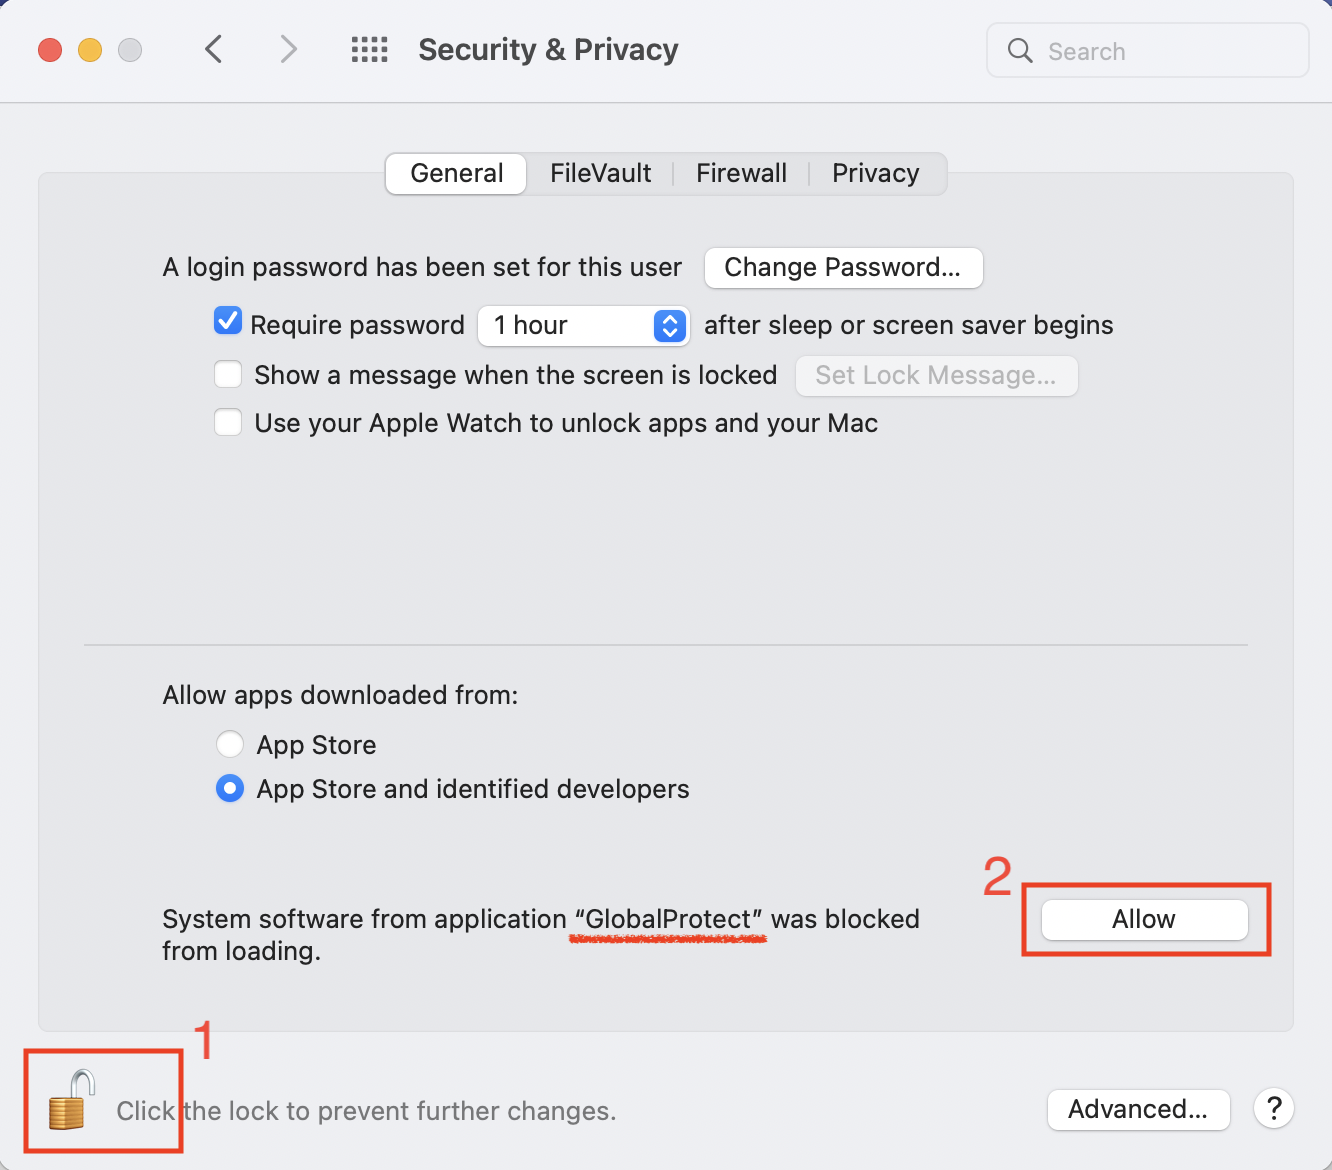
We want to whitelist the Global Protect system extension by clicking on OK to modify the macOS Security & Privacy settings.
You may need to first unlock this panel before being allowed to load GlobalProtect
If Global Protect is running in the background, you will see the globe icon in your menu bar

Ubuntu GUI: Global Protect
Download the Linux Global Protect tarball from software.pitt.edu. Within the directory containing the tarball, create a temporary directory to host the untarred files
mkdir global_protect
tar zCxf global_protect PanGPLinux-6.0.0-c18.tgz
cd global_protect
ls
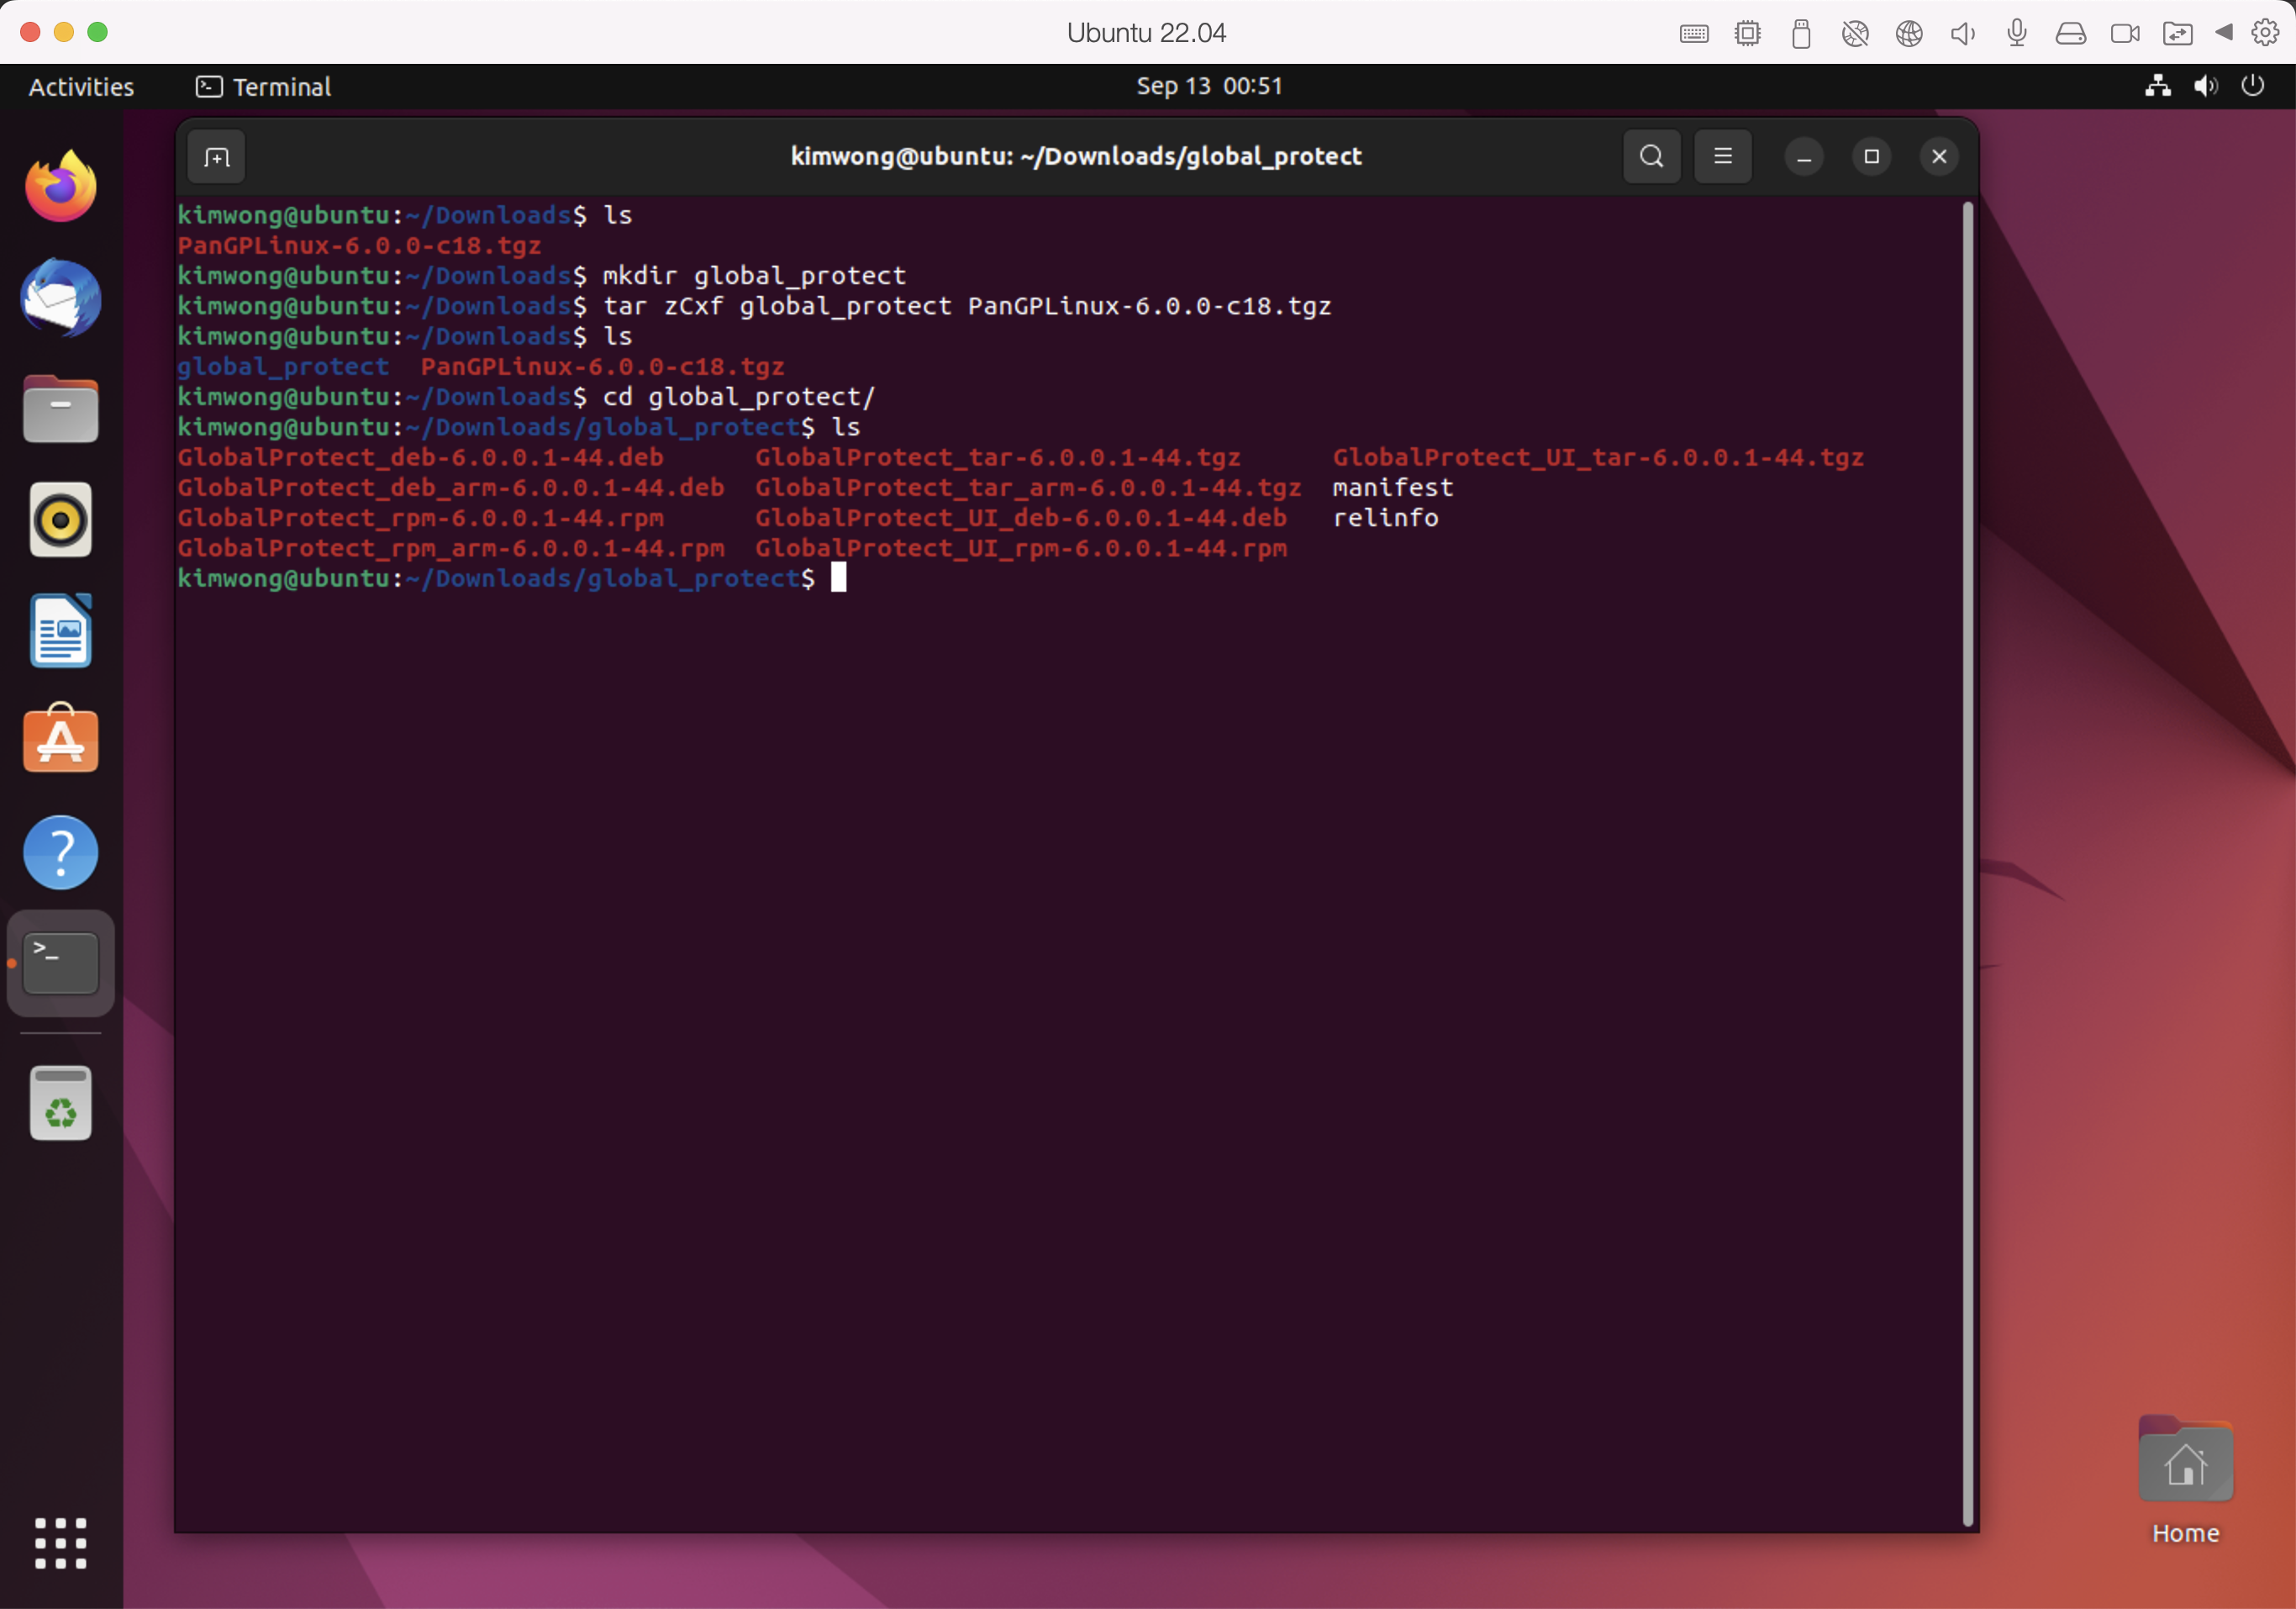
Next, we use apt-get to install the Qt5WebKit dependency
sudo apt-get -y install libqt5webkit5
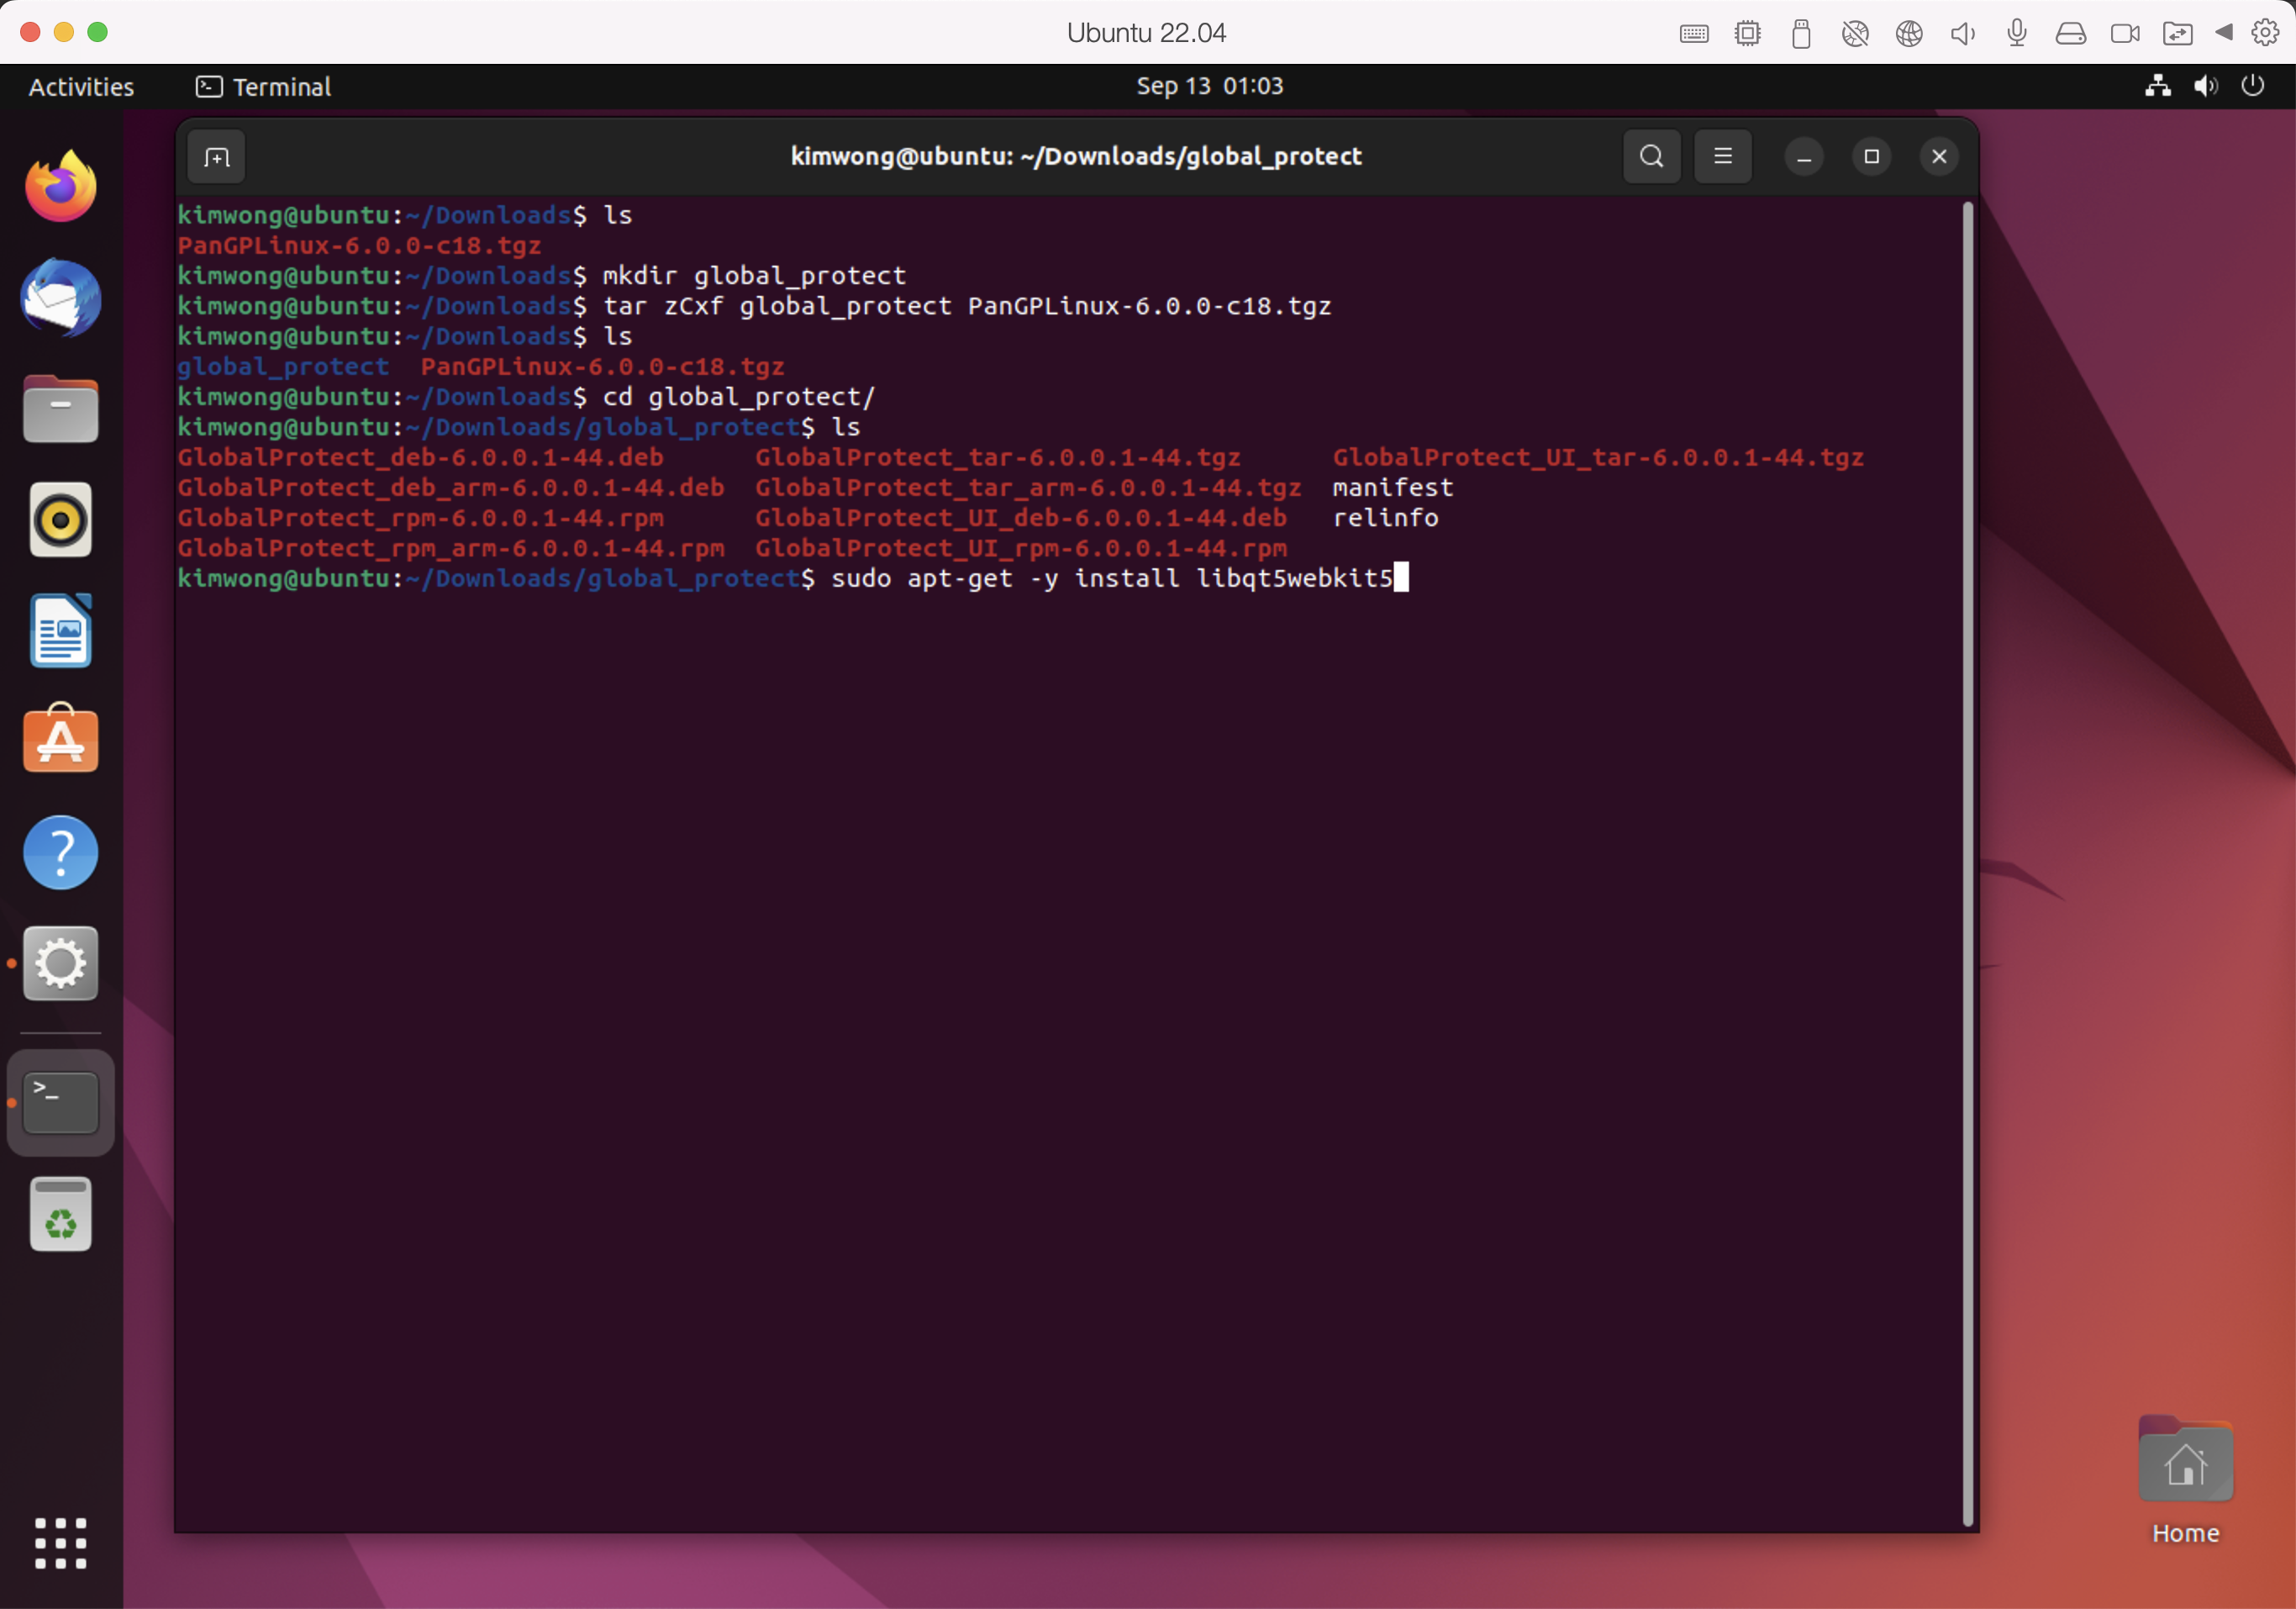
Then use dpkg to install the GlobalProtect_UI package
sudo dpkg -i GlobalProtect_UI_deb-6.0.0.1-44.deb
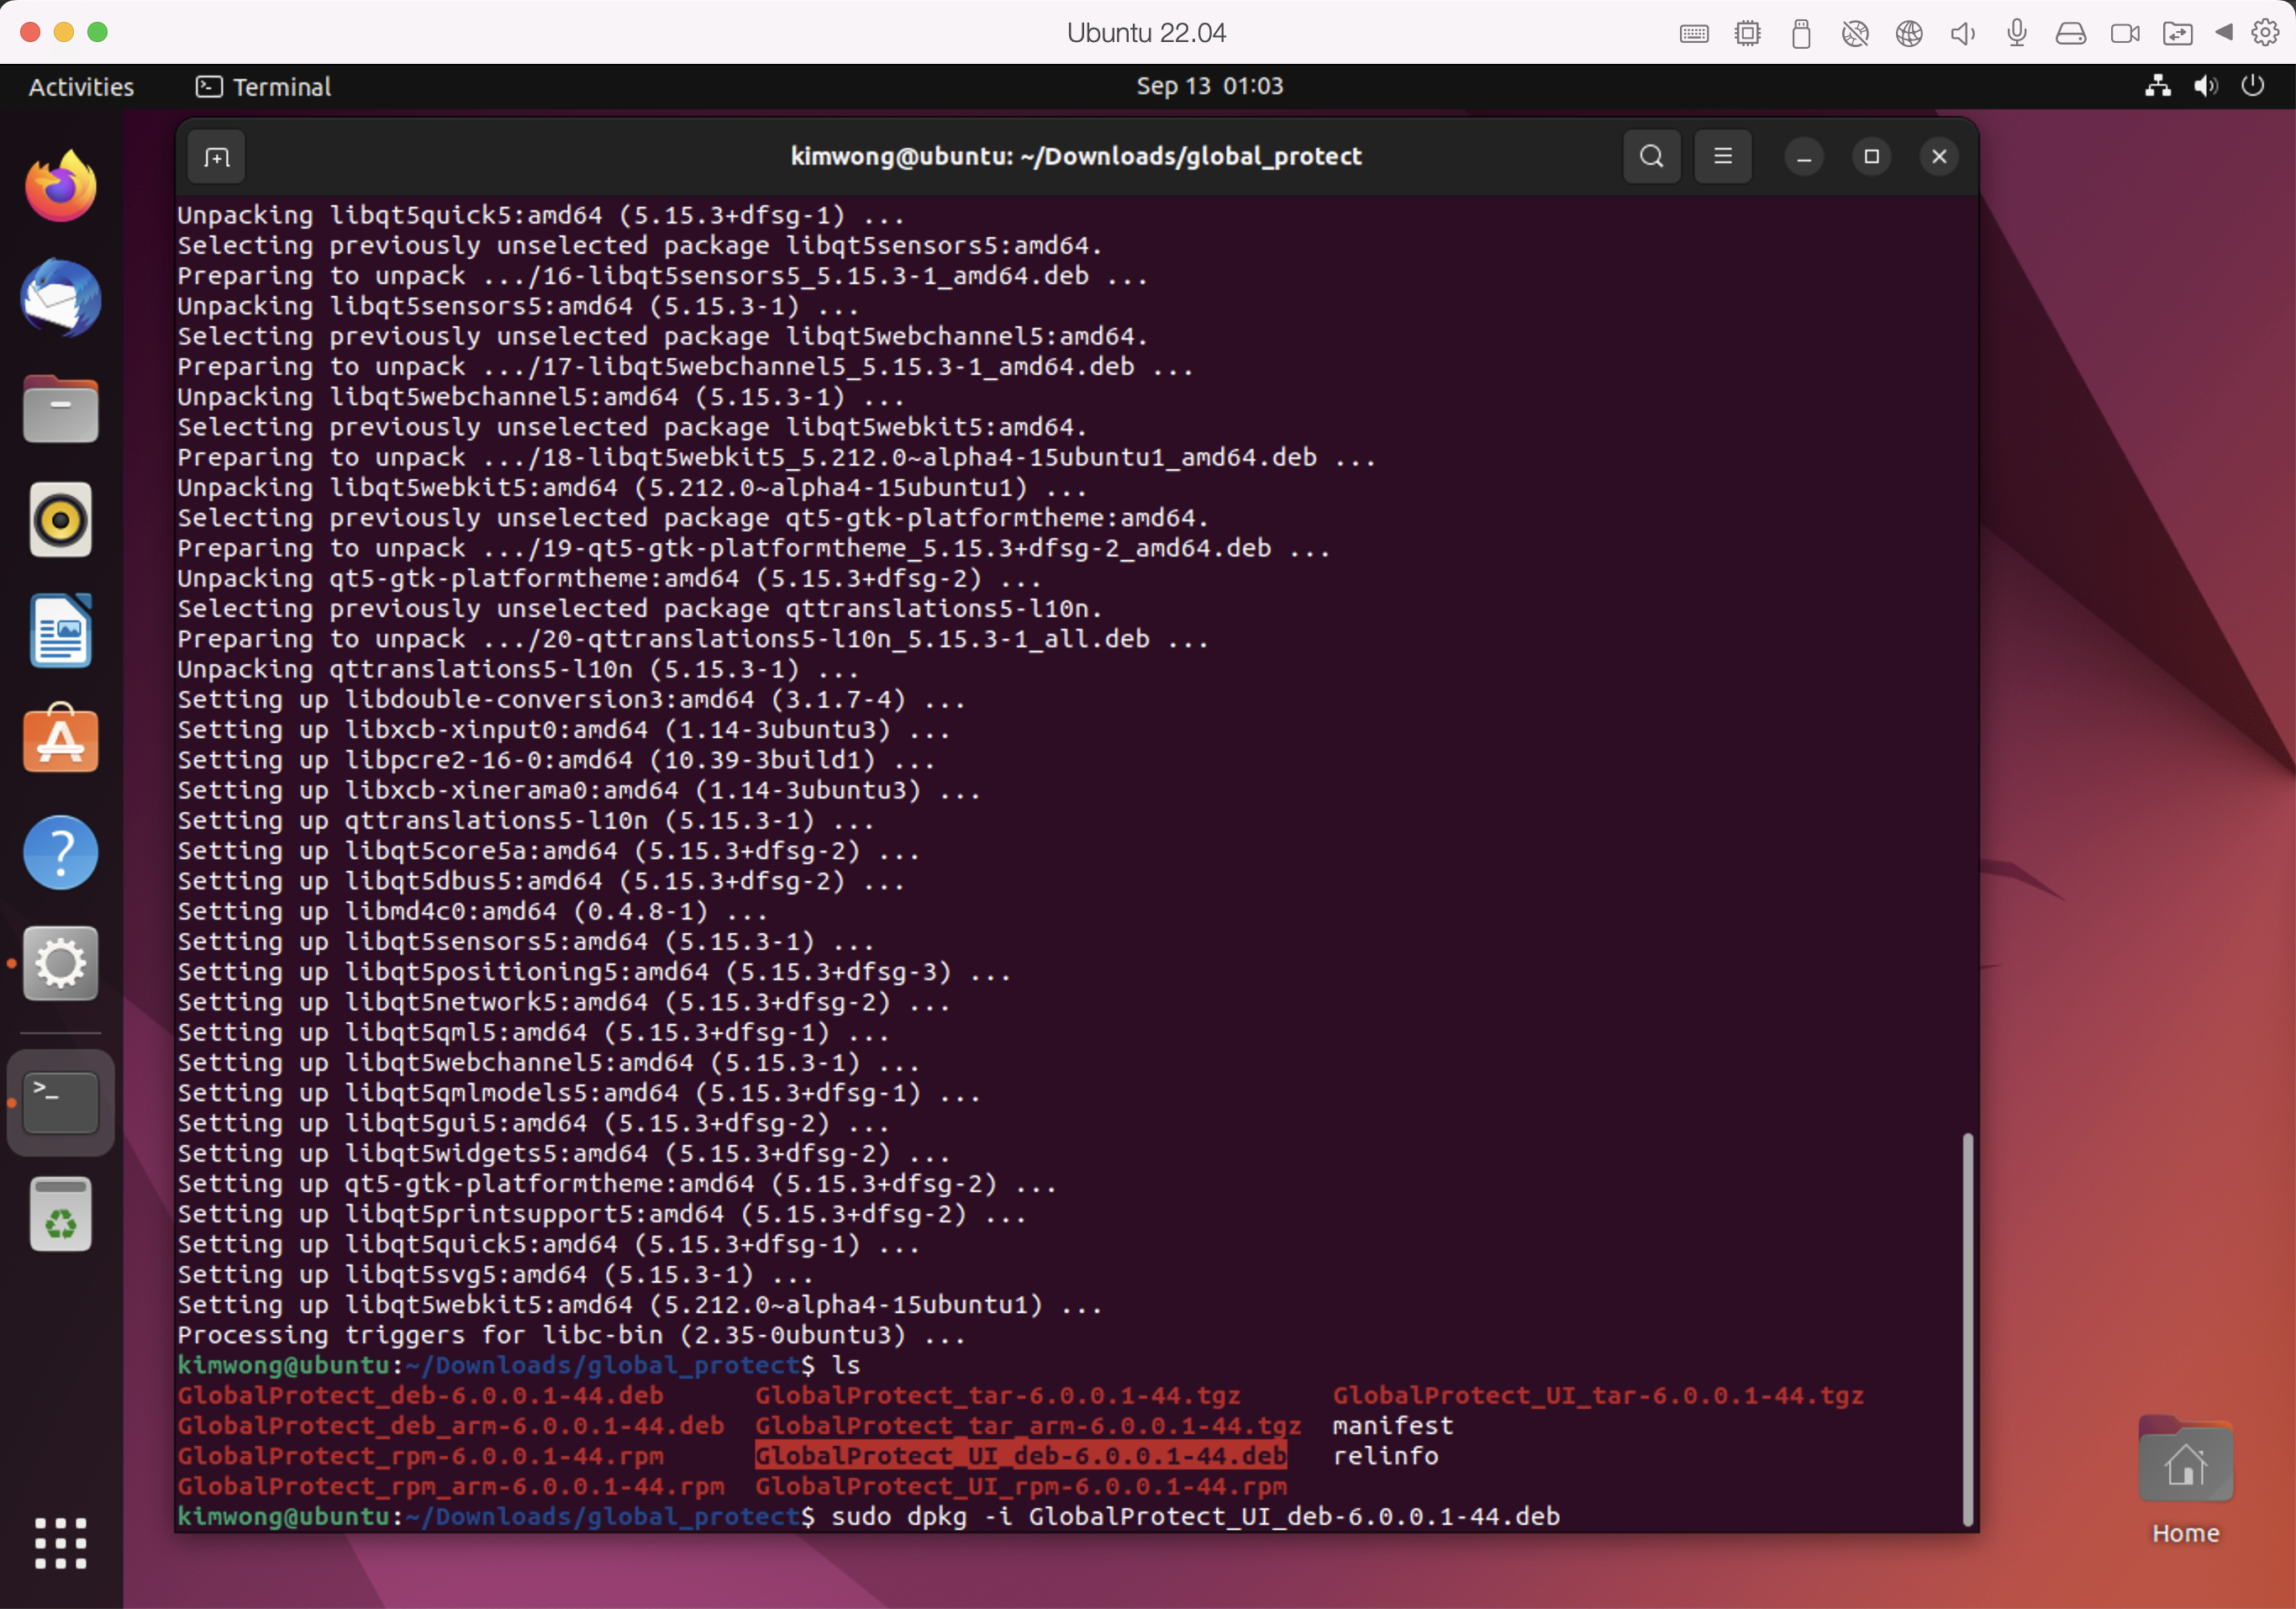
You will then be presented with panels asking for portal address, login credentials, and the Duo two-factor login
If all goes well, the panel should change to a shield with a checkmark in front of a global and with the message
Connected
Network connection secured
Now that a VPN to PittNet had been established, you can ssh to h2p.crc.pitt.edu
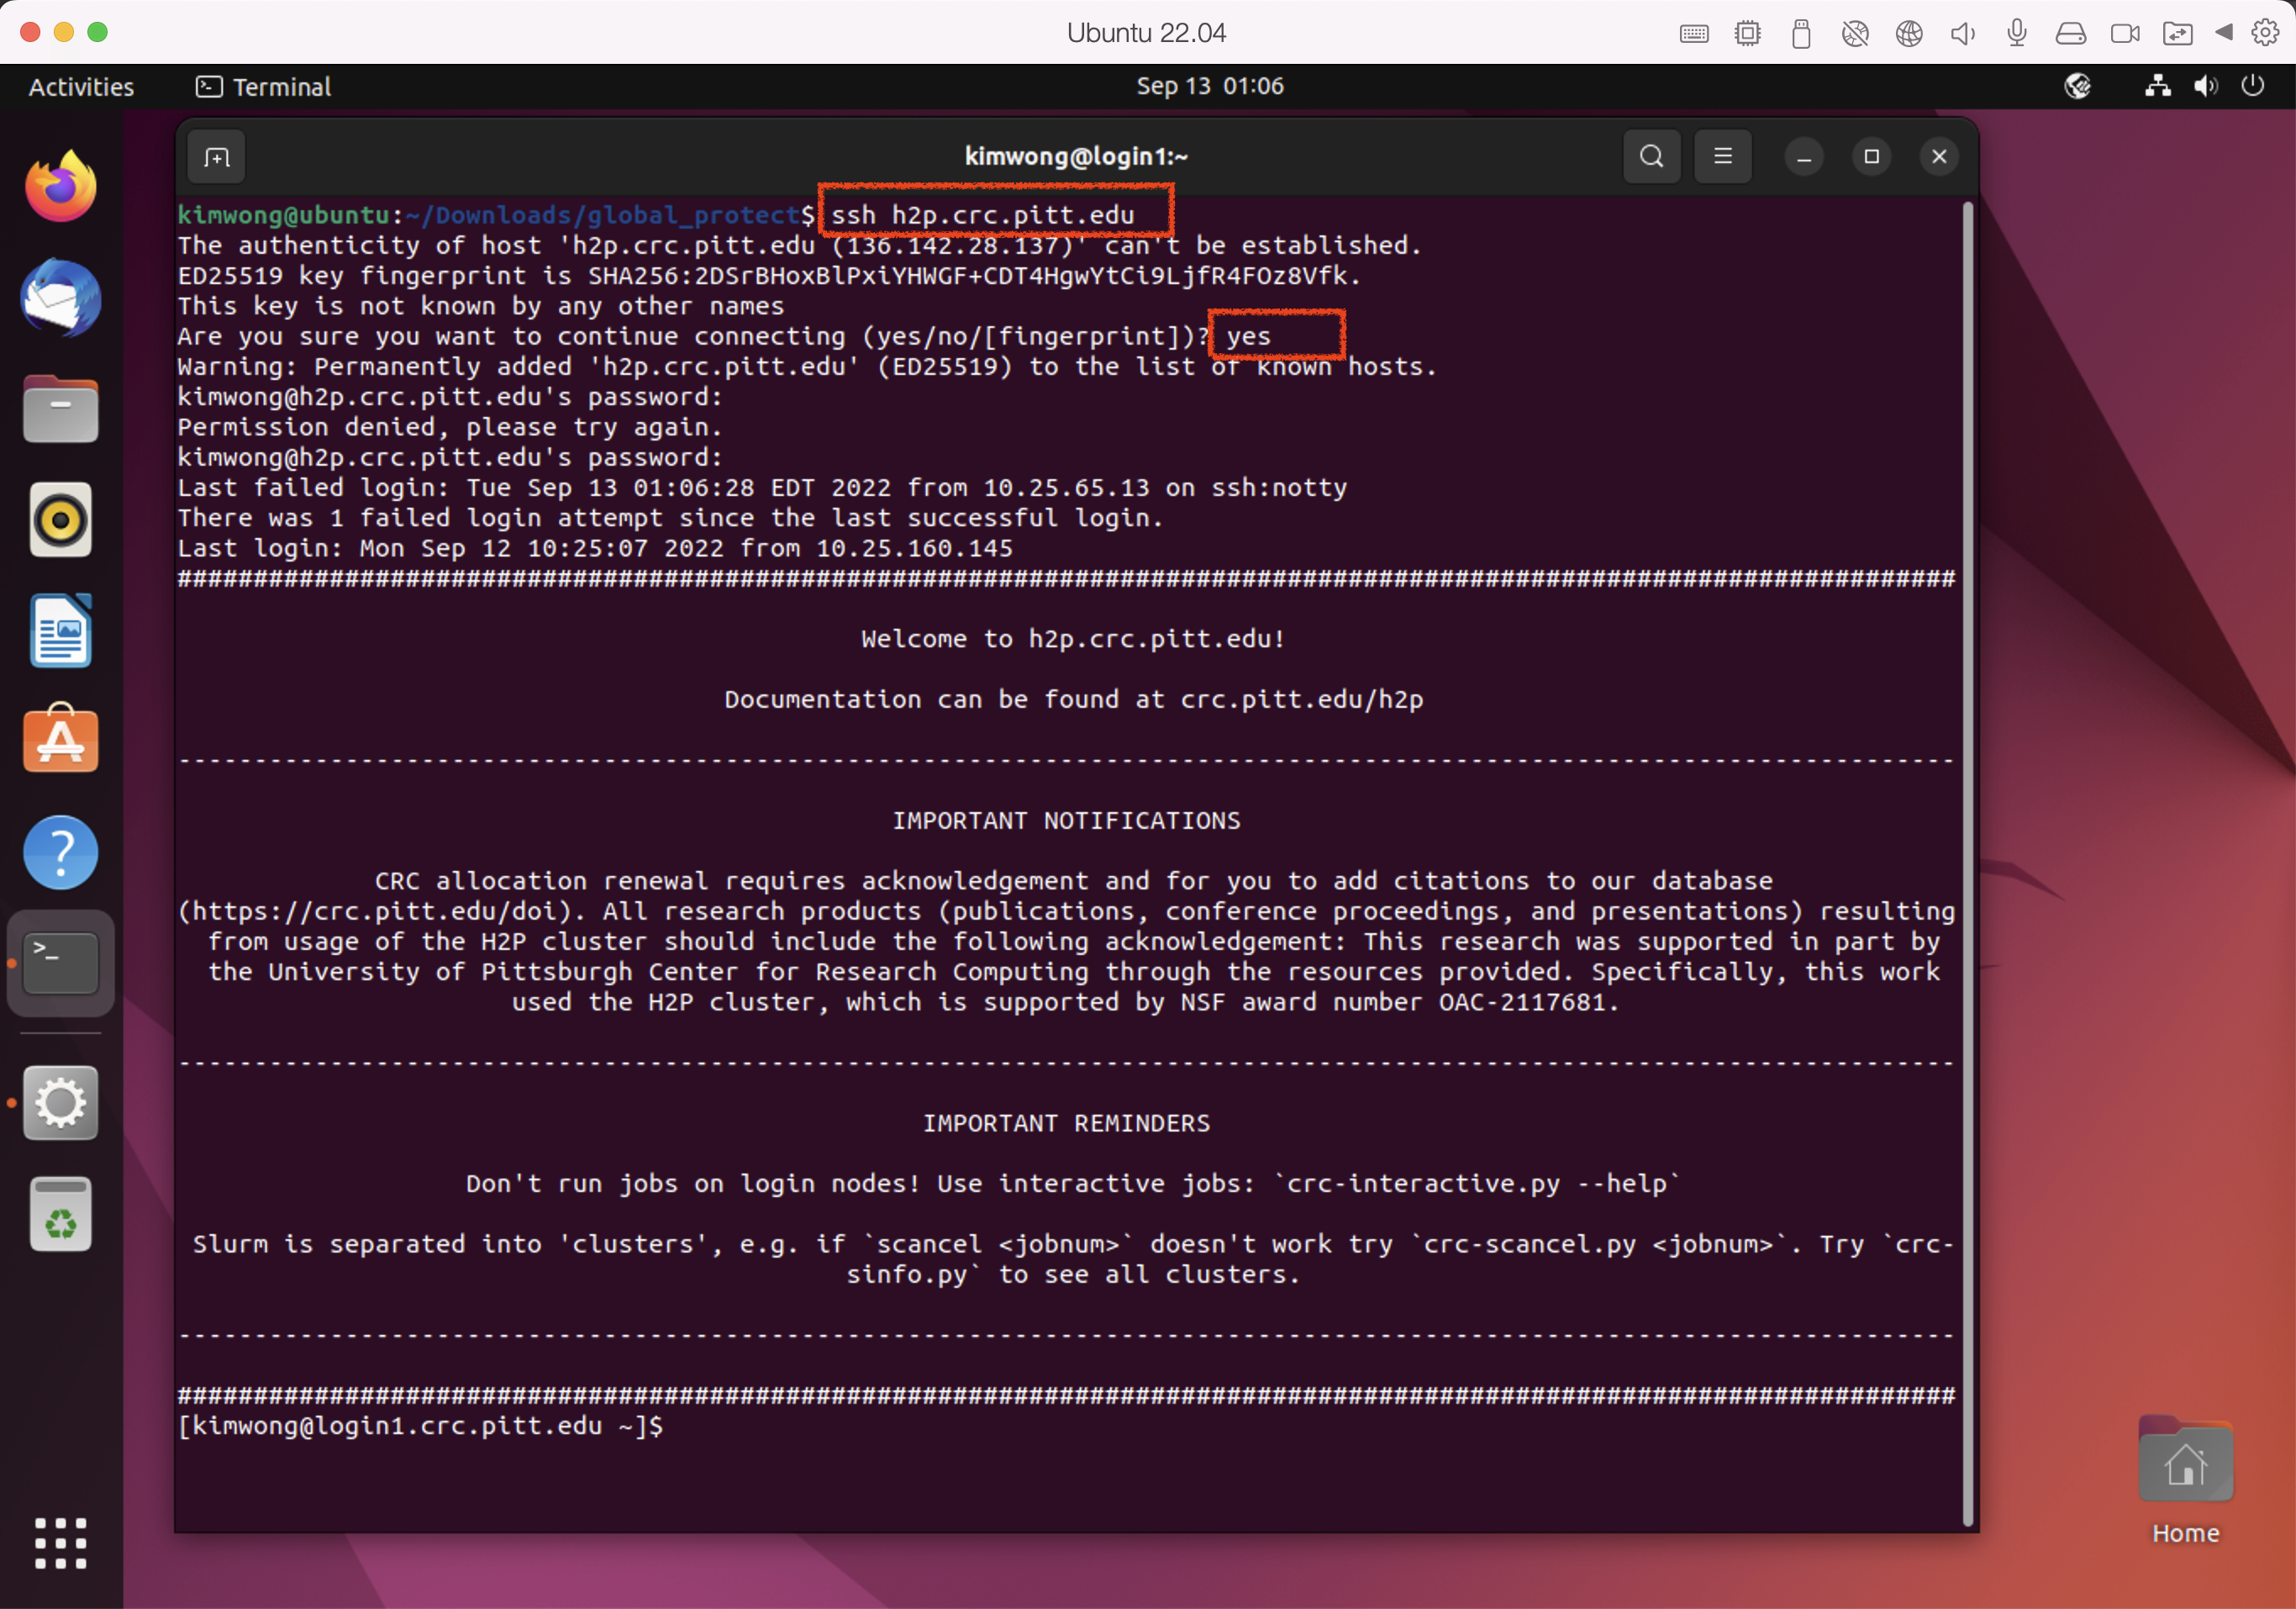
With the VPN installed, you are now ready to access the cluster.
CRC provides several modes for accessing the advanced computing and storage resources, including
Each interface is briefly described below.
SSH Connection via Terminal
If your local computer uses the Windows operating system, you can use a Secure SHell (SSH) client to connect to the cluster. For example, the portable edition of MobaXterm is freely available and a good tool to start with.
Execute MobaXterm and click on the + Start local terminal button to open a terminal. Recall that in The Ecosystem schematic, the remote login node H2P's address is h2p.crc.pitt.edu
Here are the connection details:
- connection protocol: ssh
- remote hostname: h2p.crc.pitt.edu
- authentication credentials: Pitt username and password
The syntax to connect to the H2P login node is
ssh -X username@h2p.crc.pitt.edu
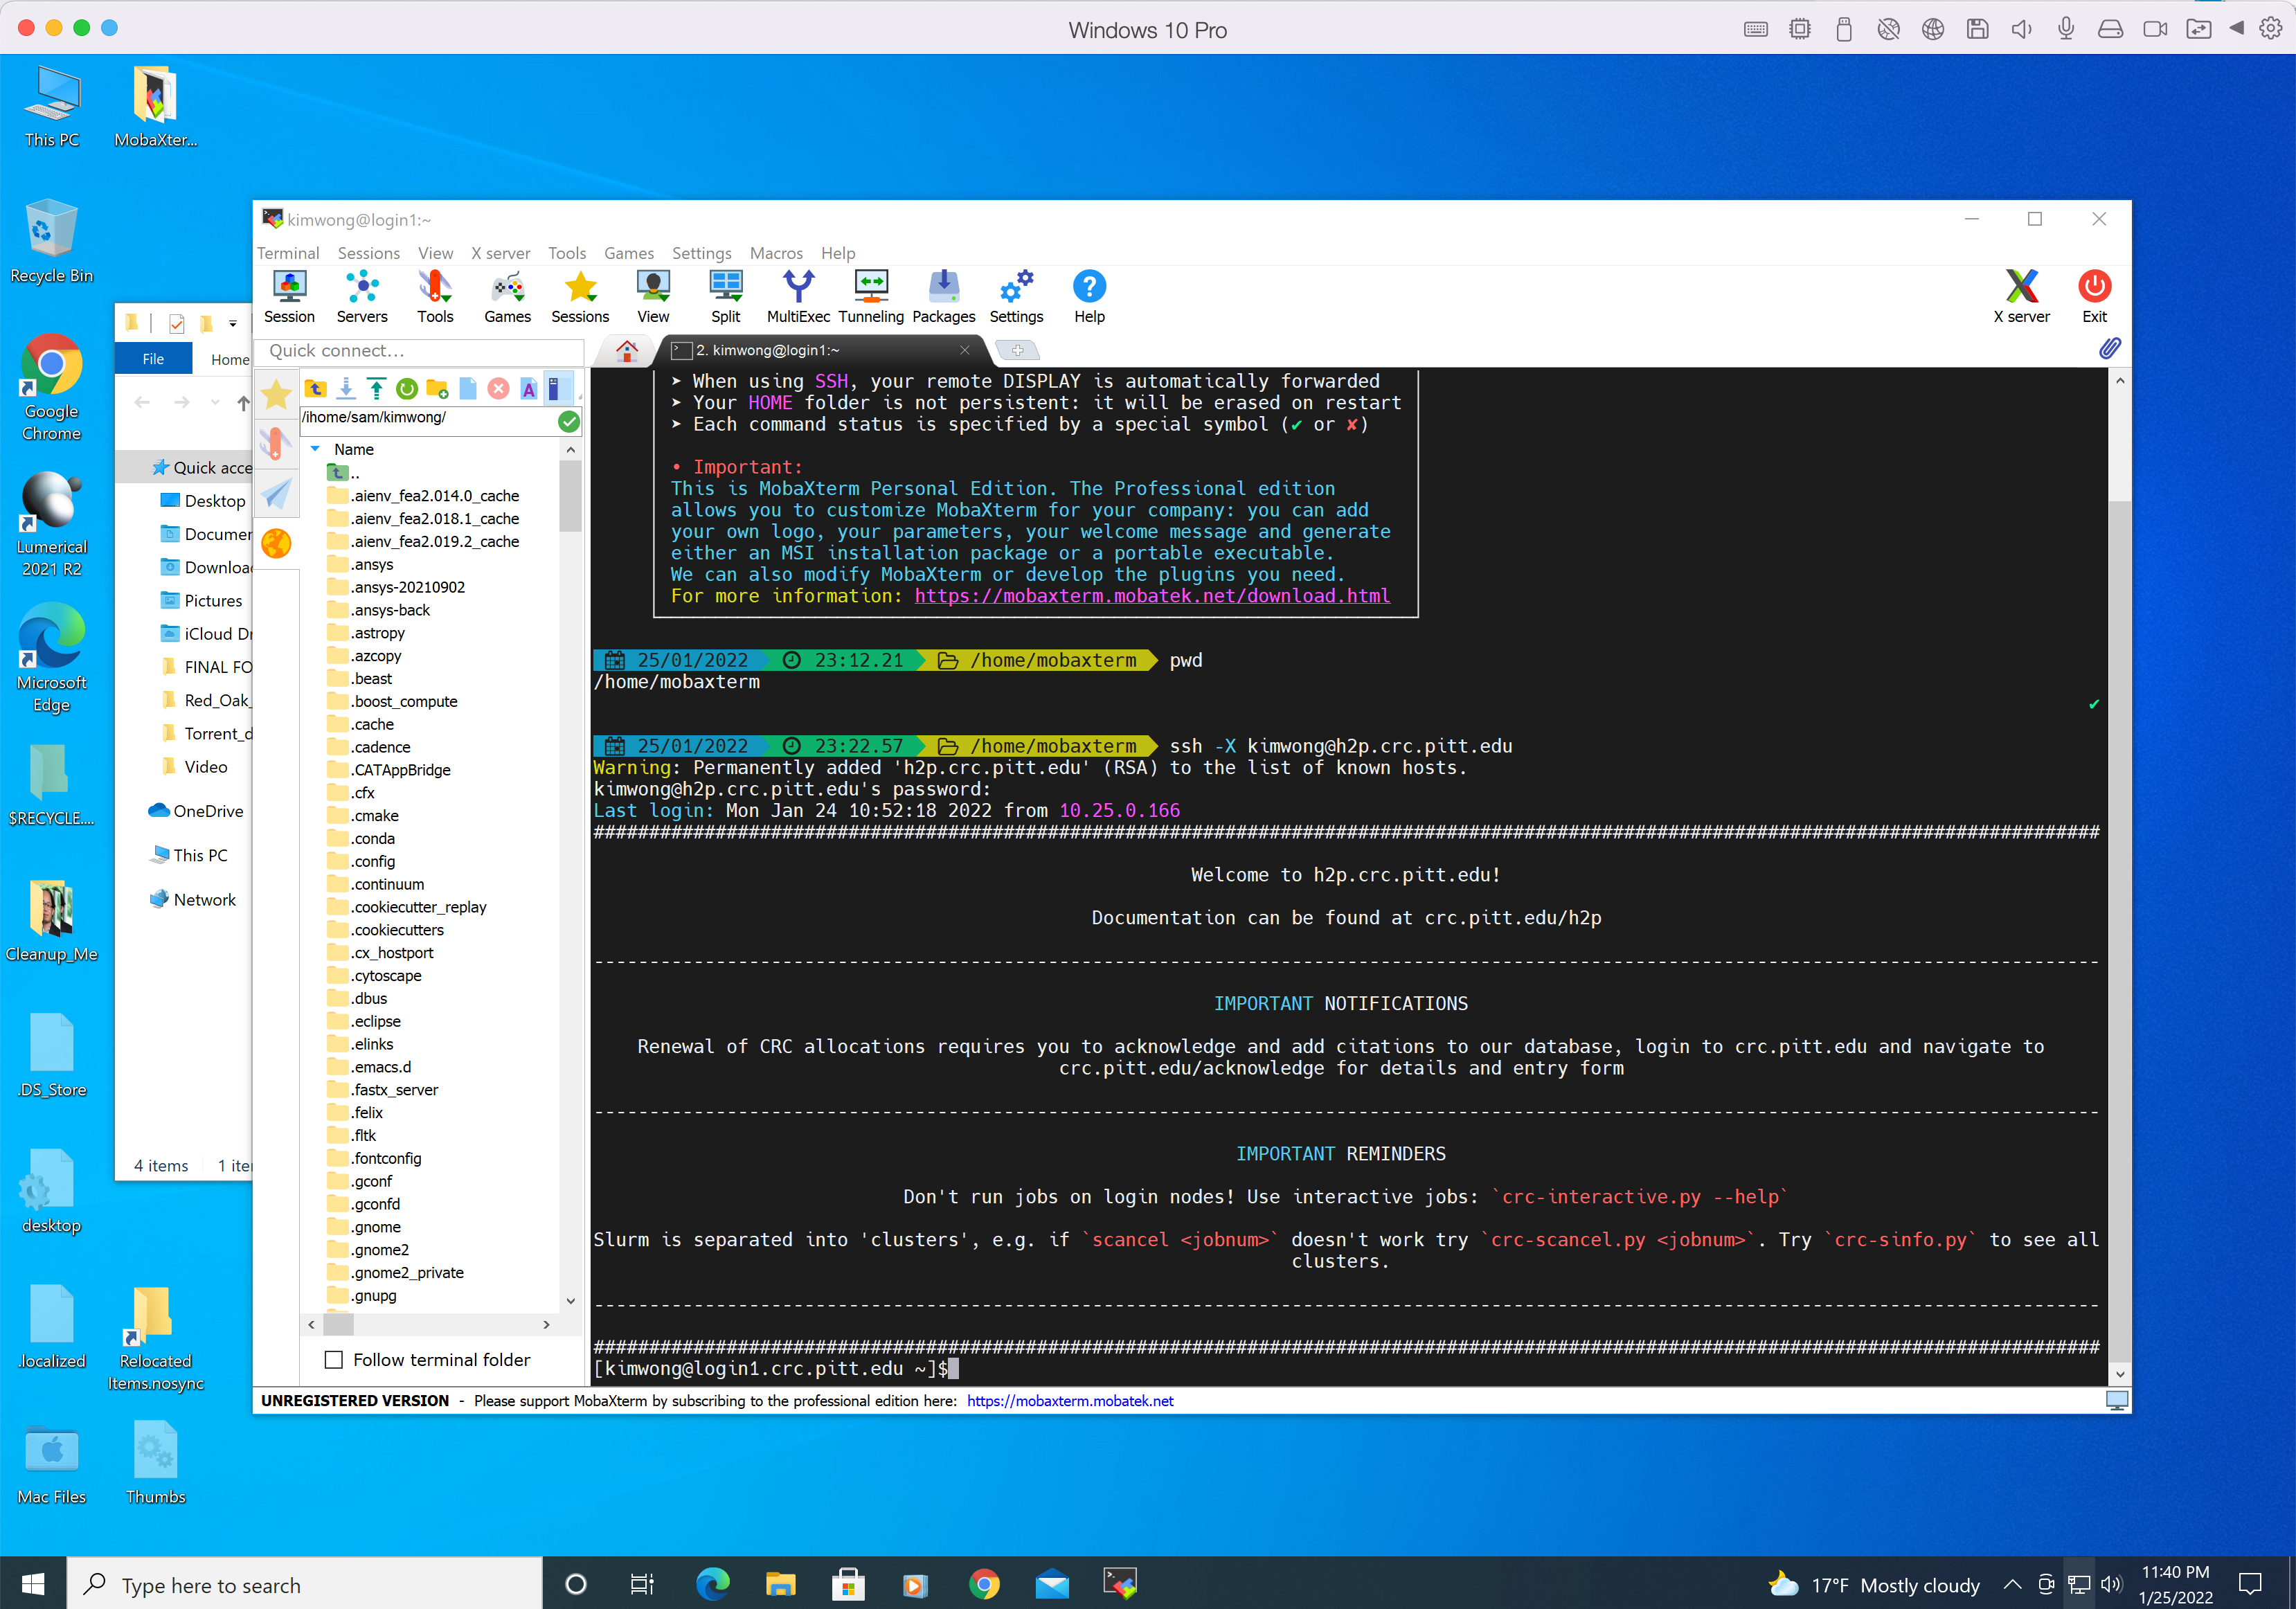
where username is your Pitt username in lowercase and the answer to the prompt is the corresponding password. The -X option enables X forwarding for applications that generate a GUI such as xclock. If you type xclock on the commandline, you should get a clock app showing in Windows.
Below is a login session from MobaXterm.
If your client computer is macOS, a recommended tool is iTerm2. While macOS already has a built-in Terminal in the Utilities folder, iTerm2 is more feature-rich. To render graphics, a tool like XQuartz is needed to provide the X Server component.
Below is a login session using iTerm2 and XQuartz, following the same syntax as shown earlier. 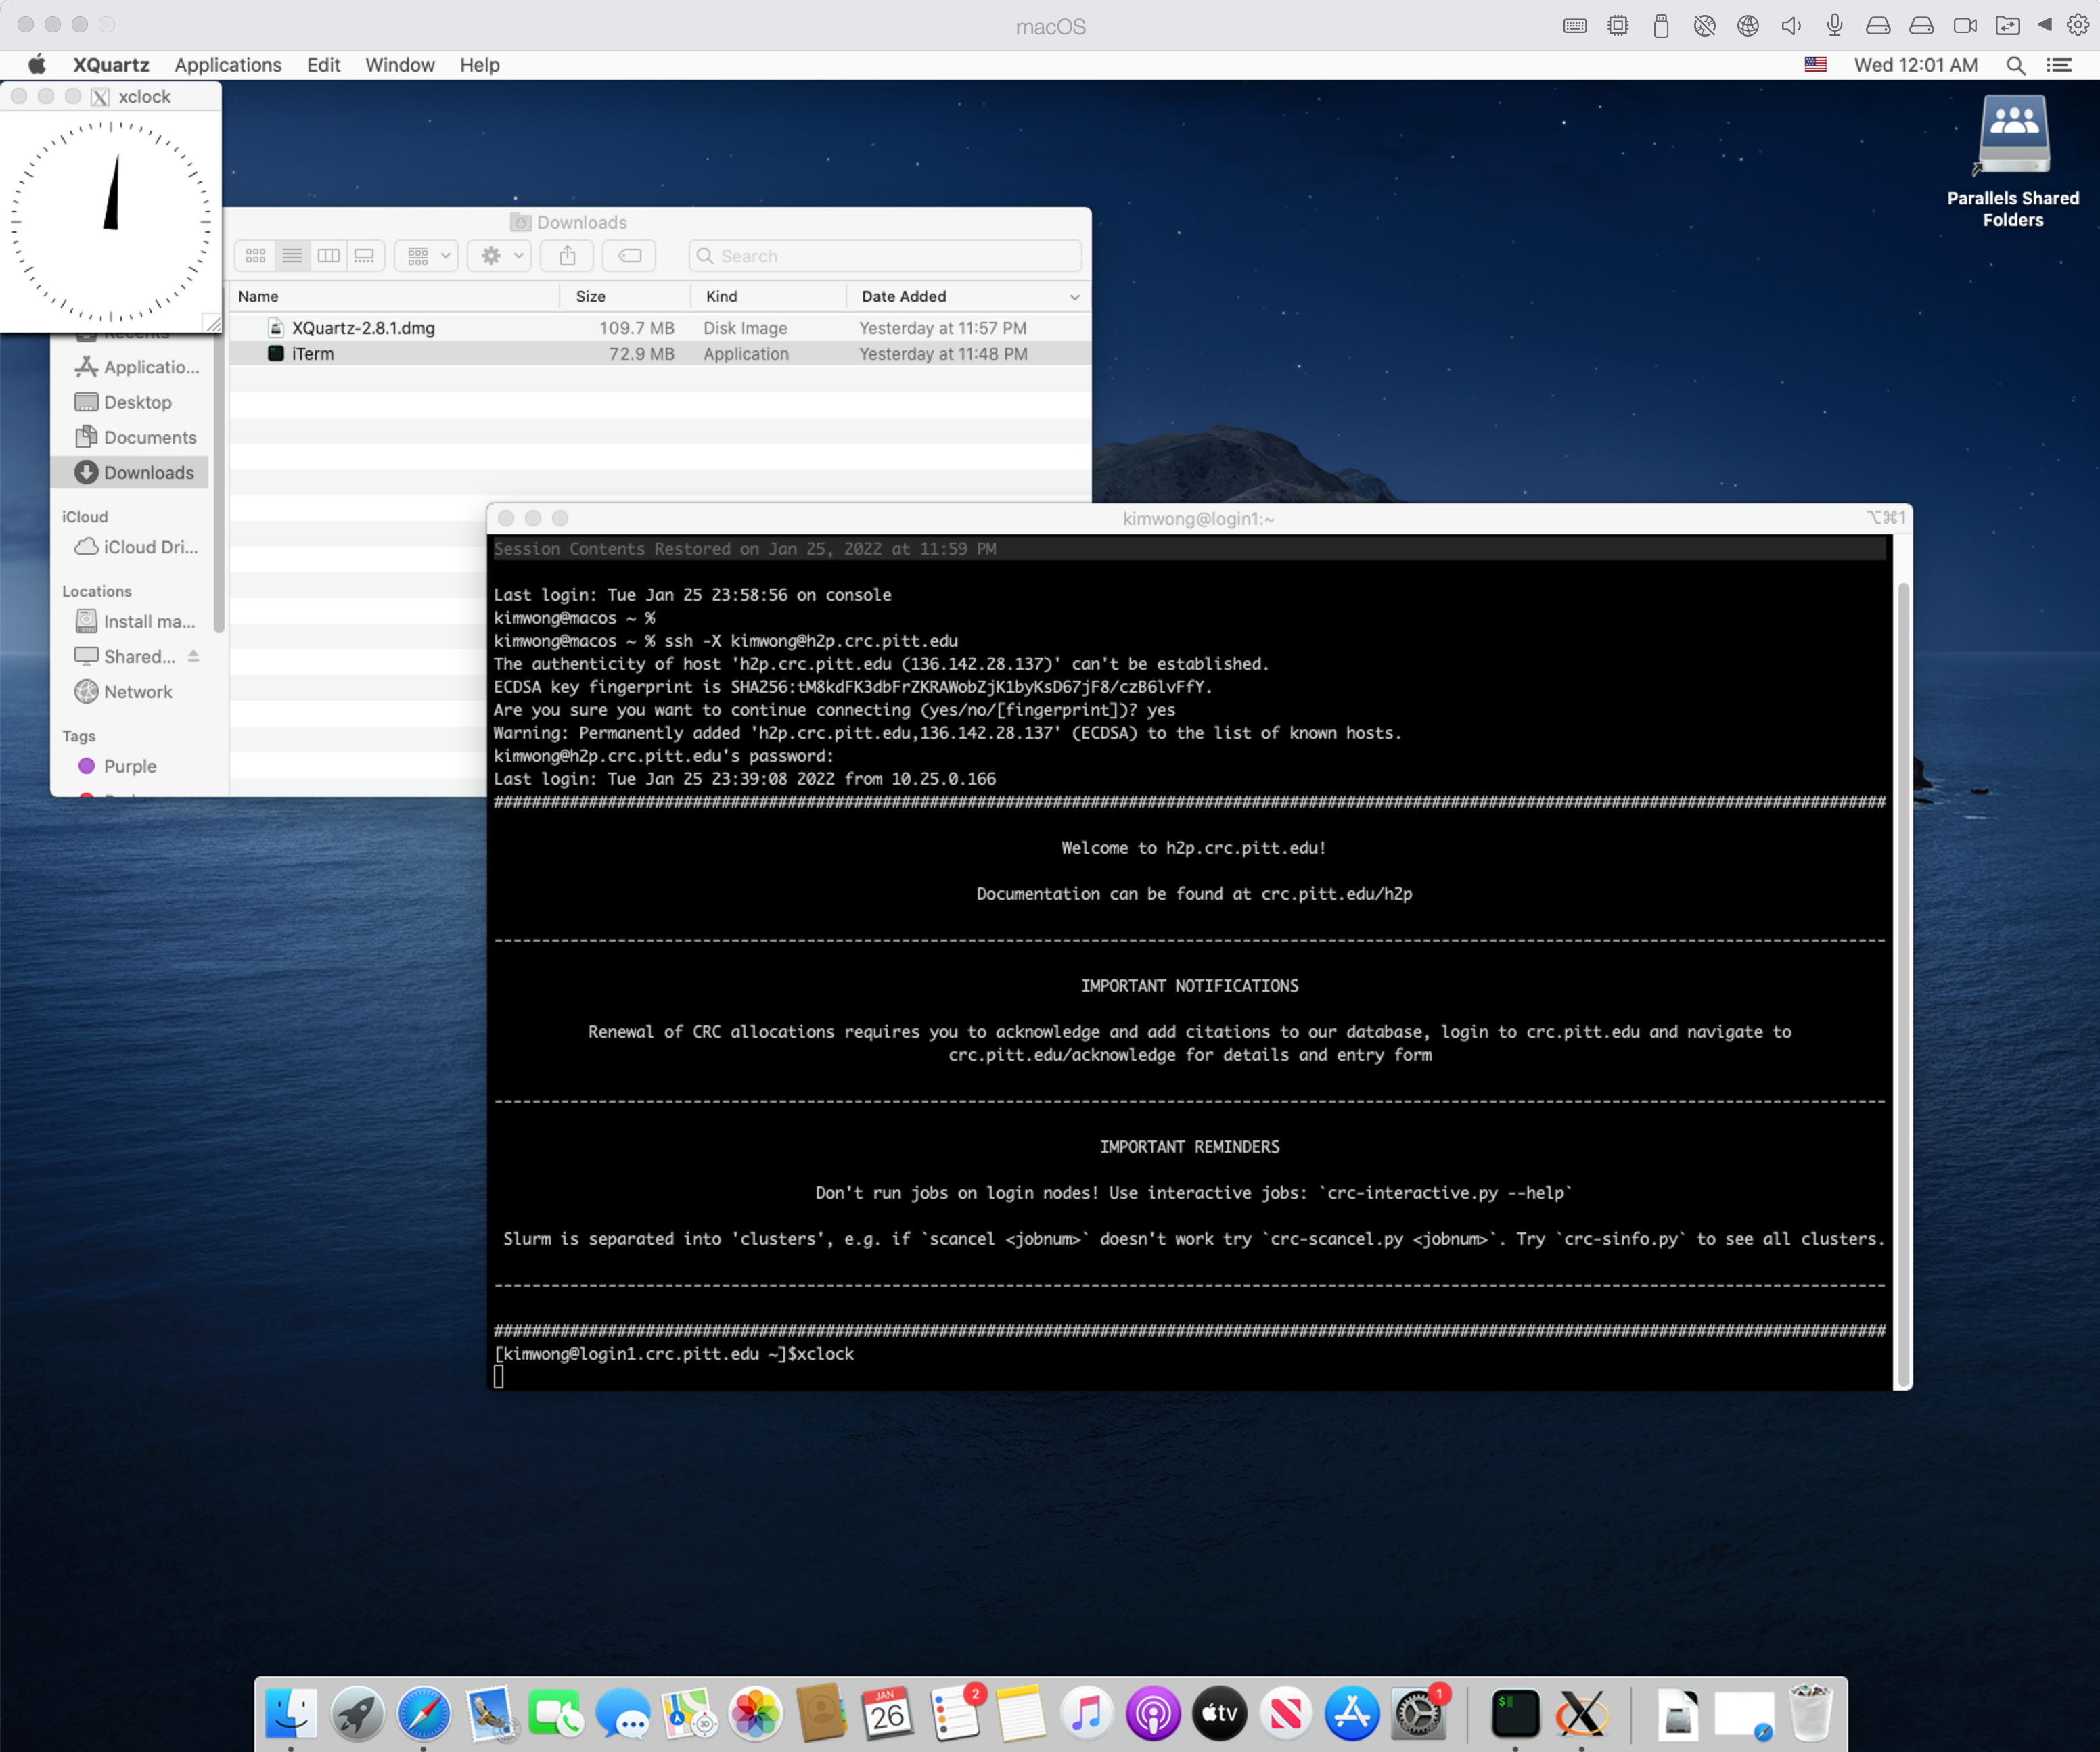
VIZ Web Portal
CRC provides access to a Linux Desktop GUI using a web browser.
Navigate in your web browser to viz.crc.pitt.edu and authenticate using your Pitt credentials.
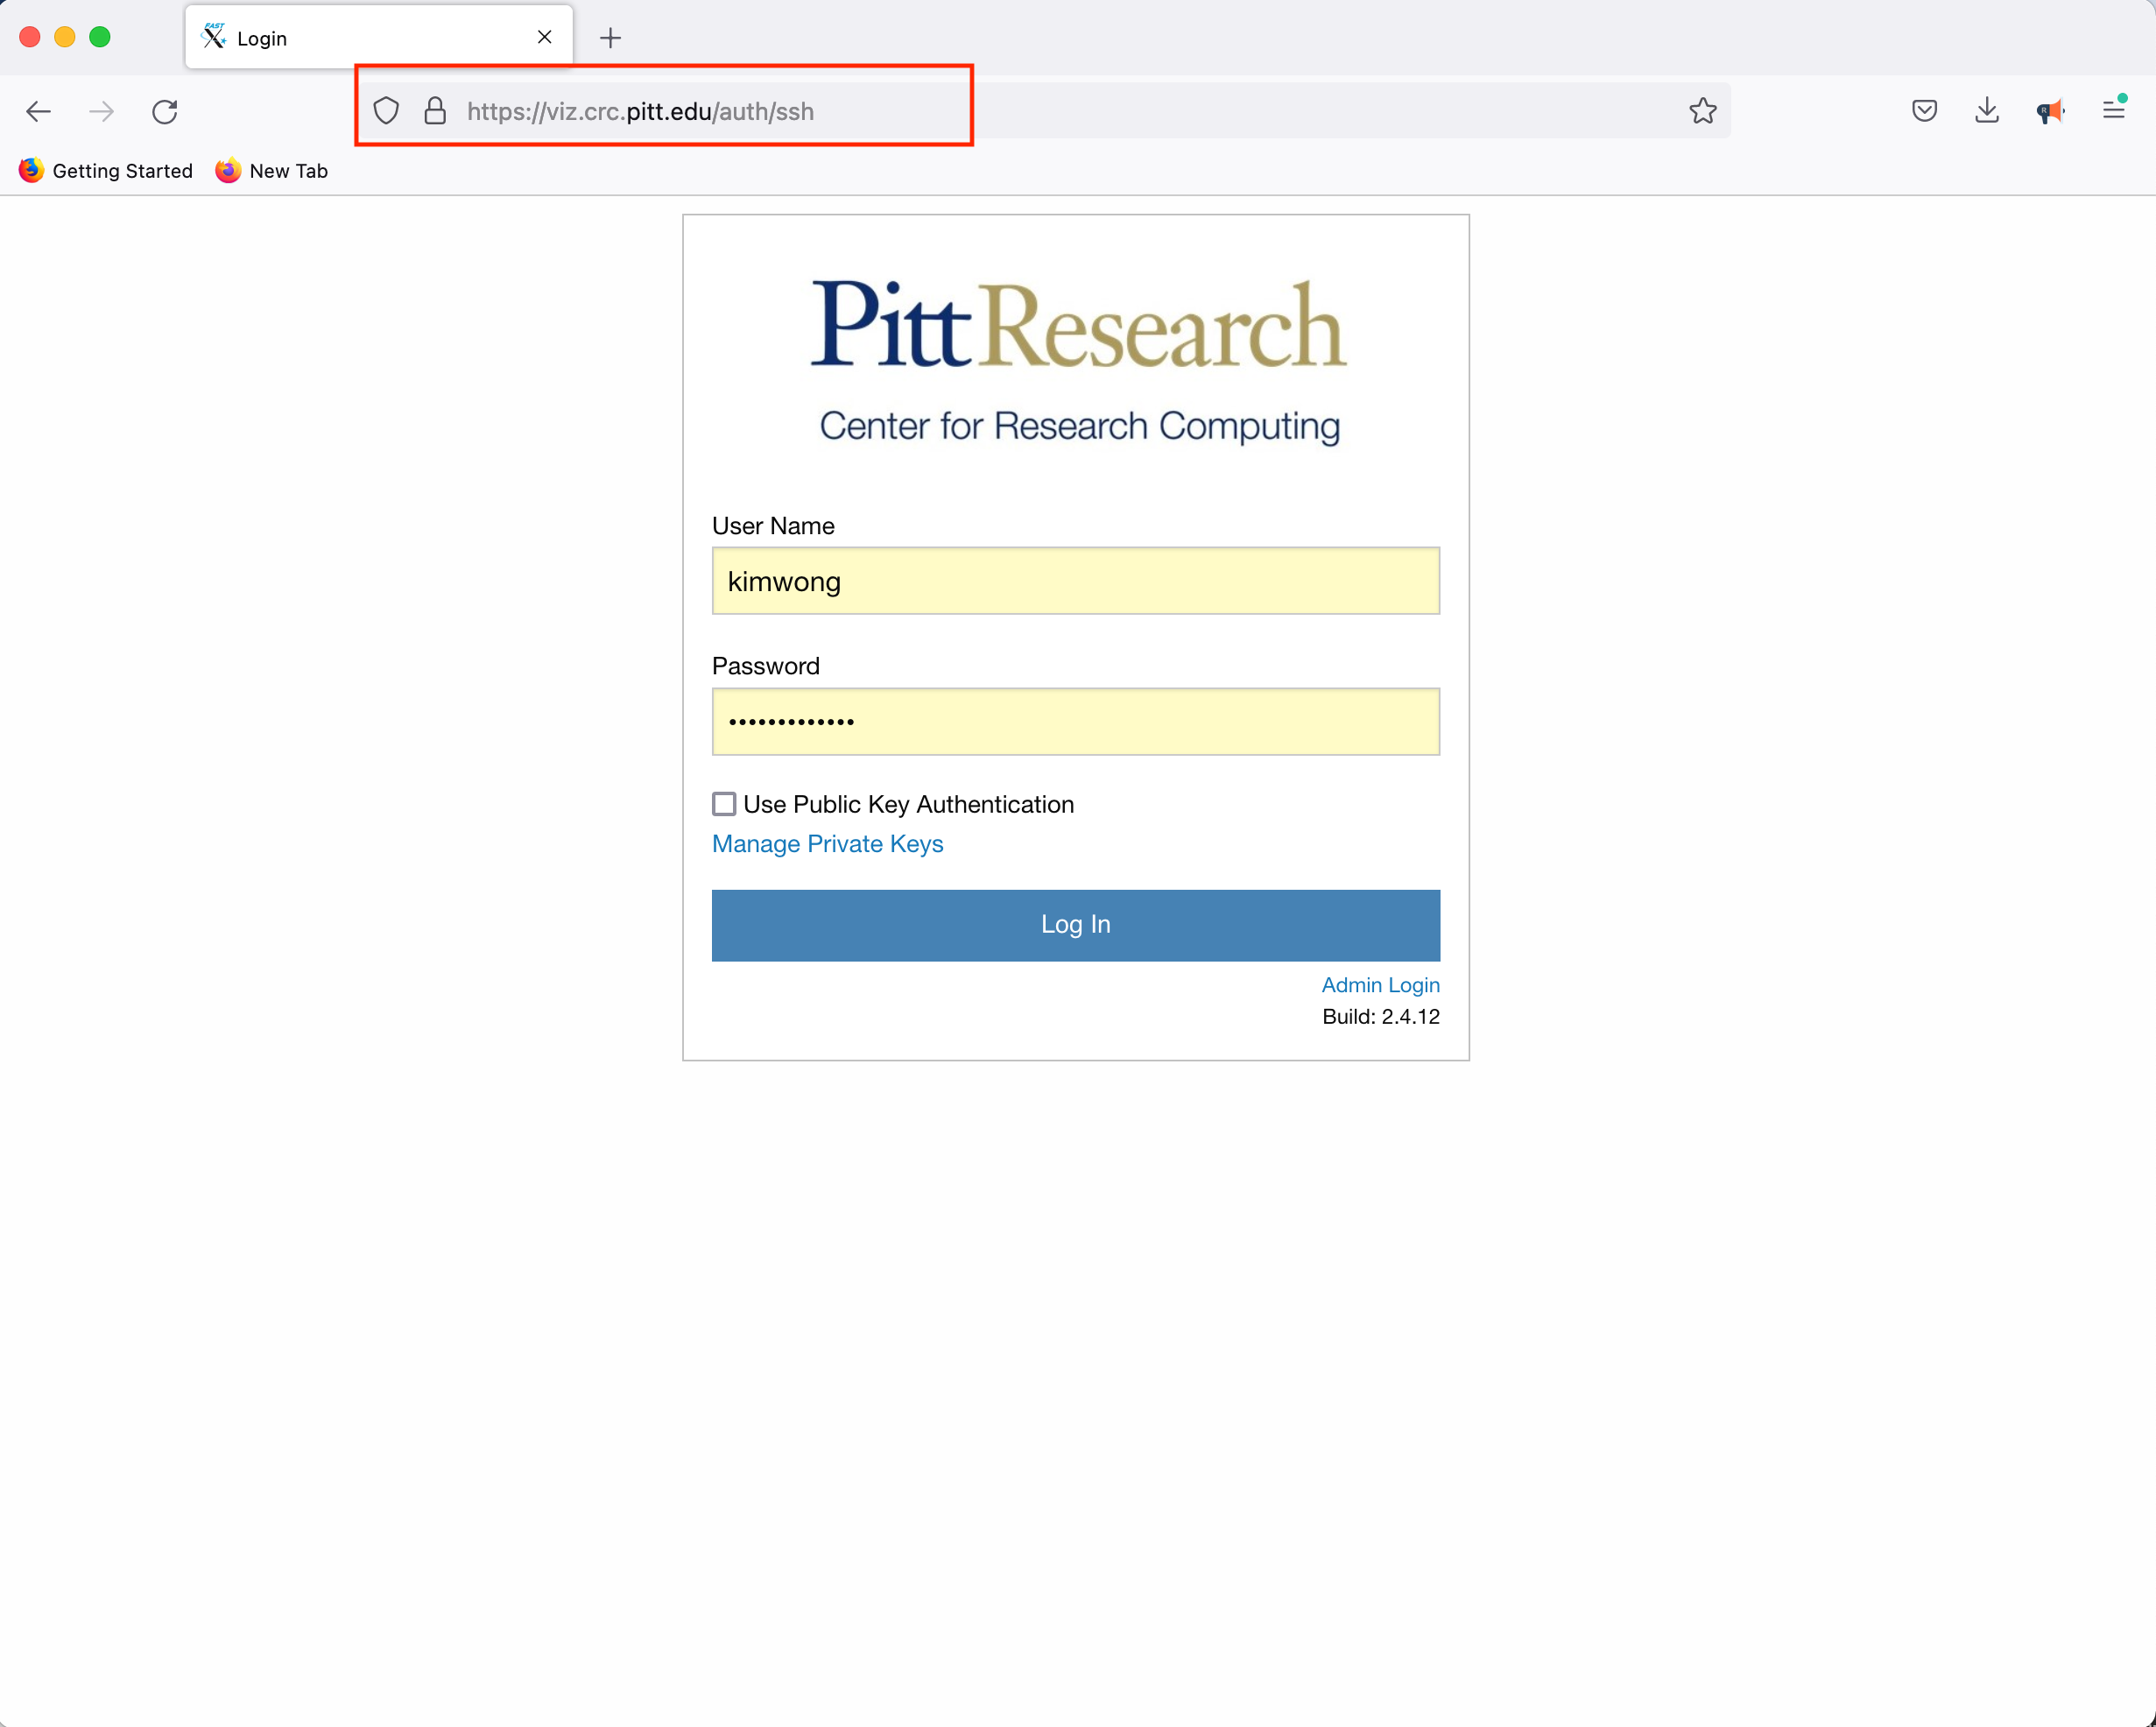
Click Launch Session, click on MATE, and click Launch 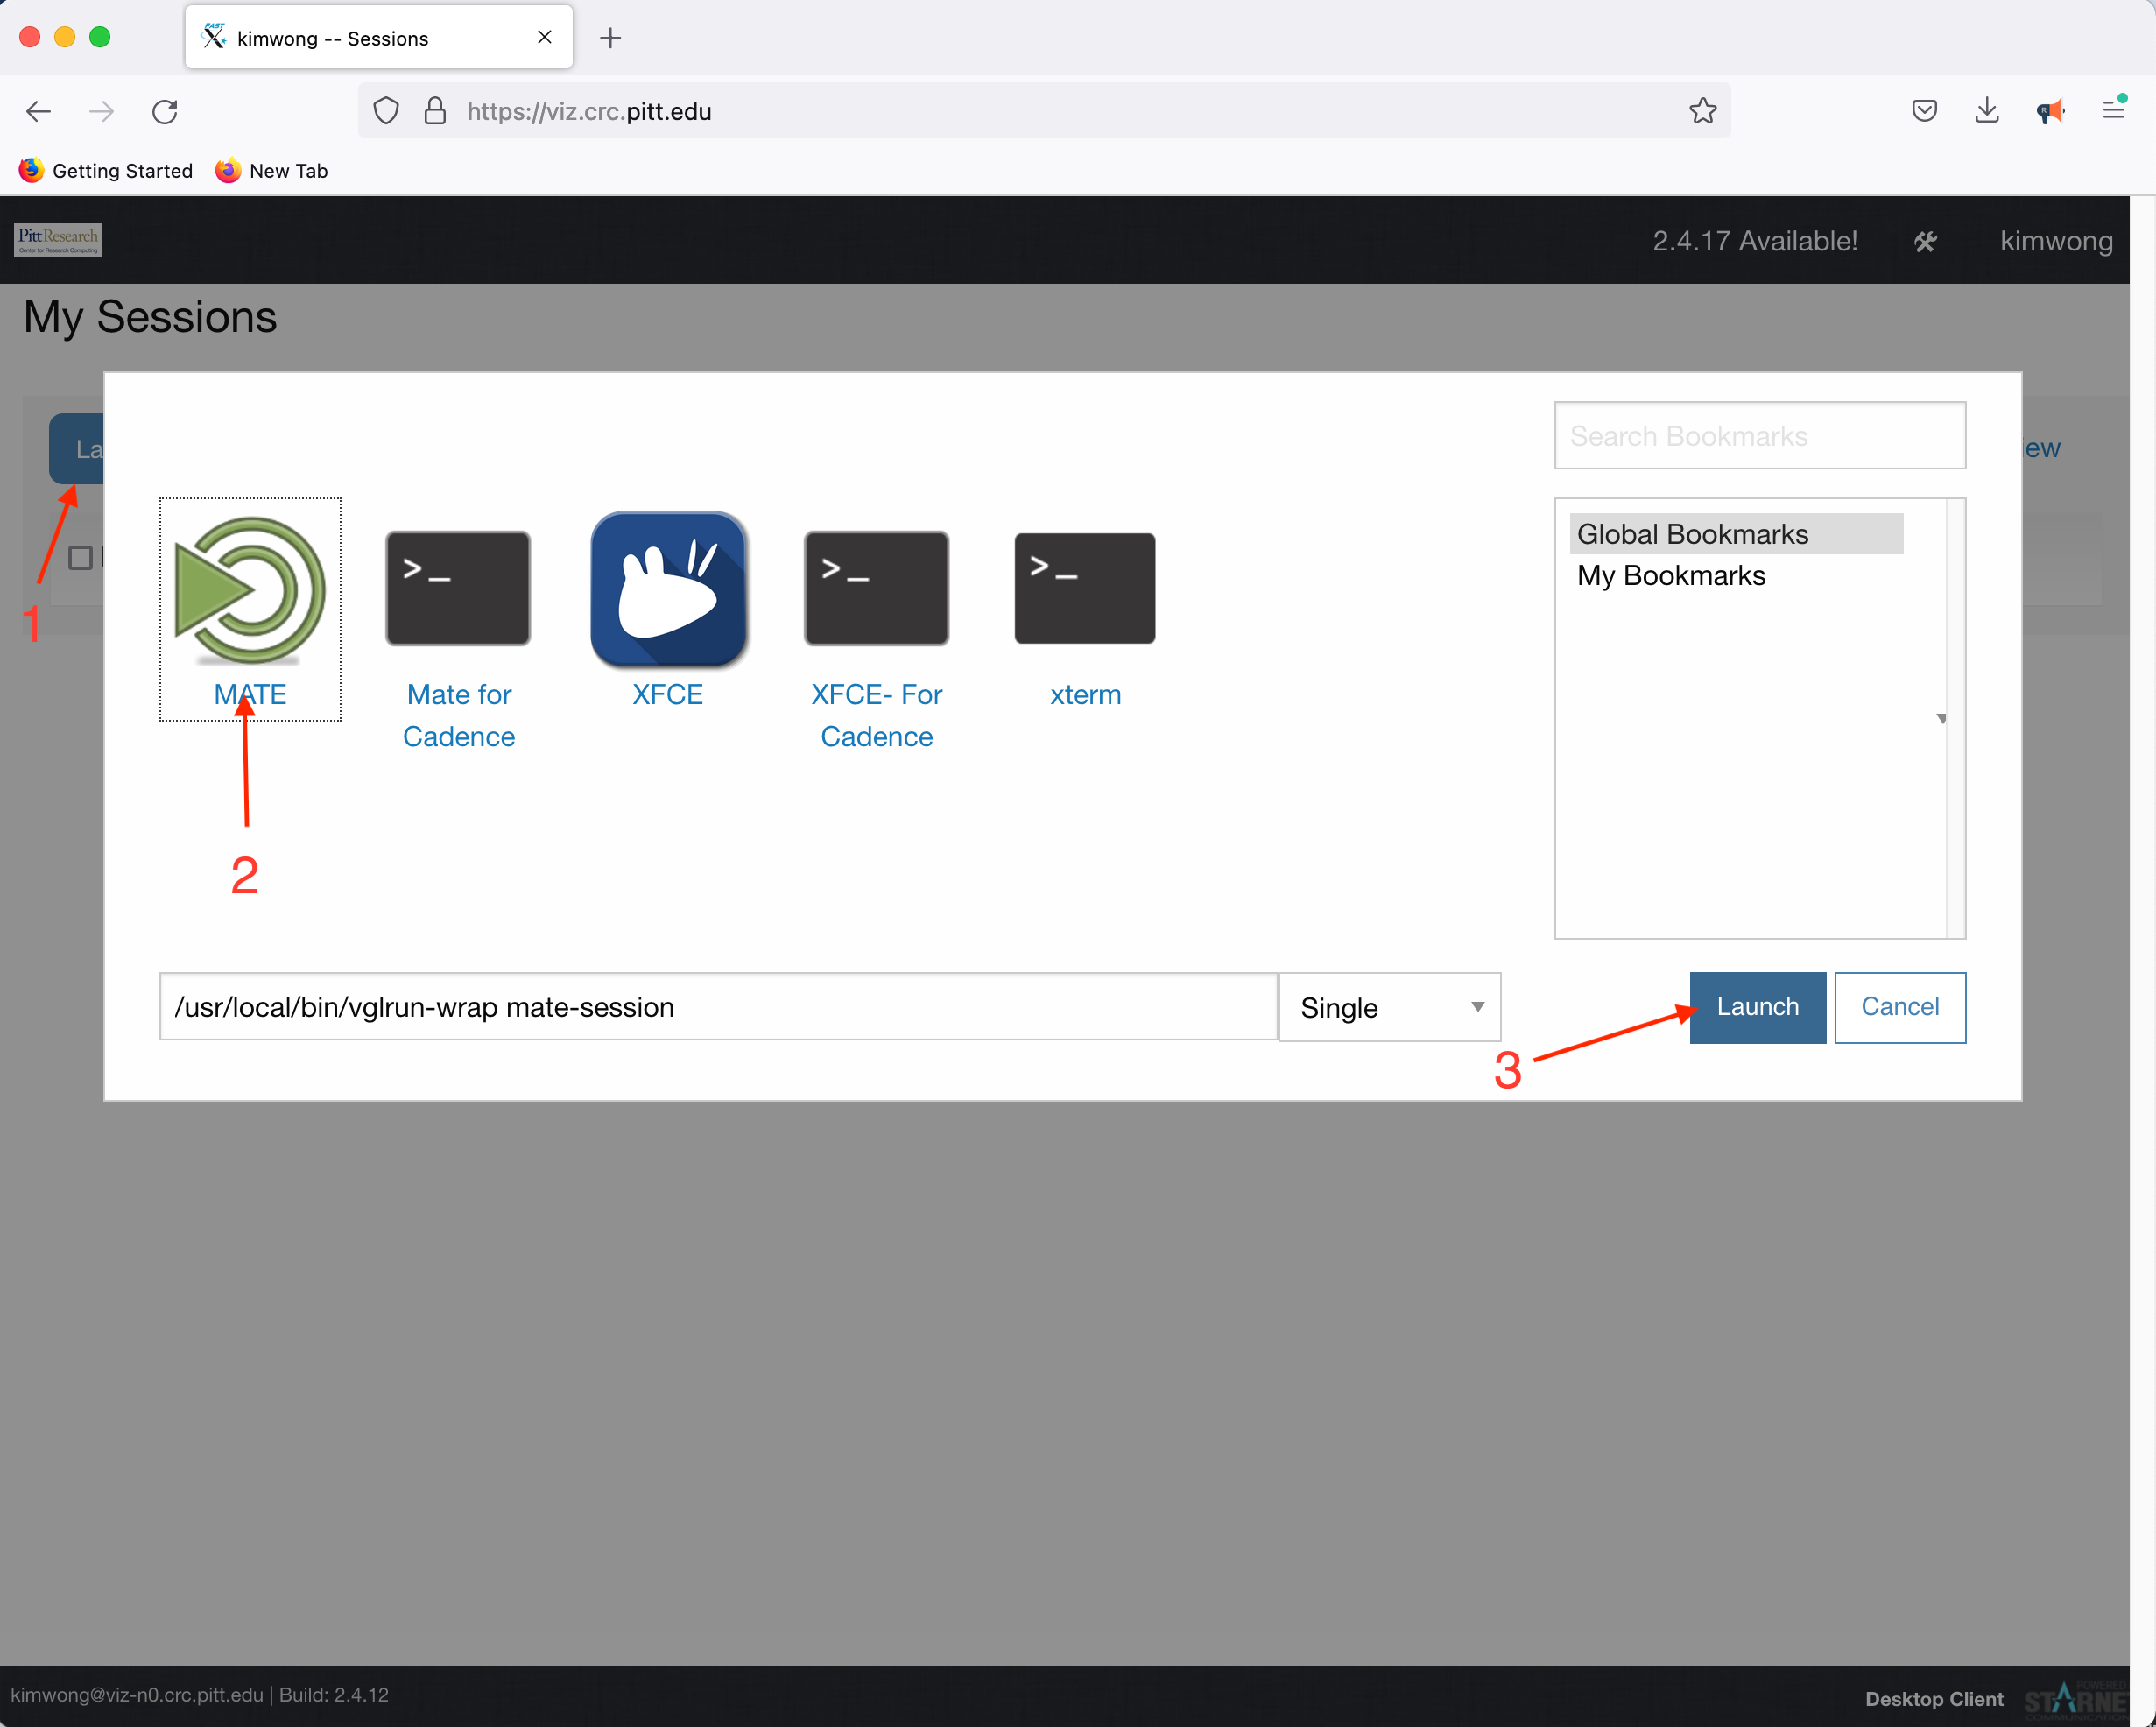
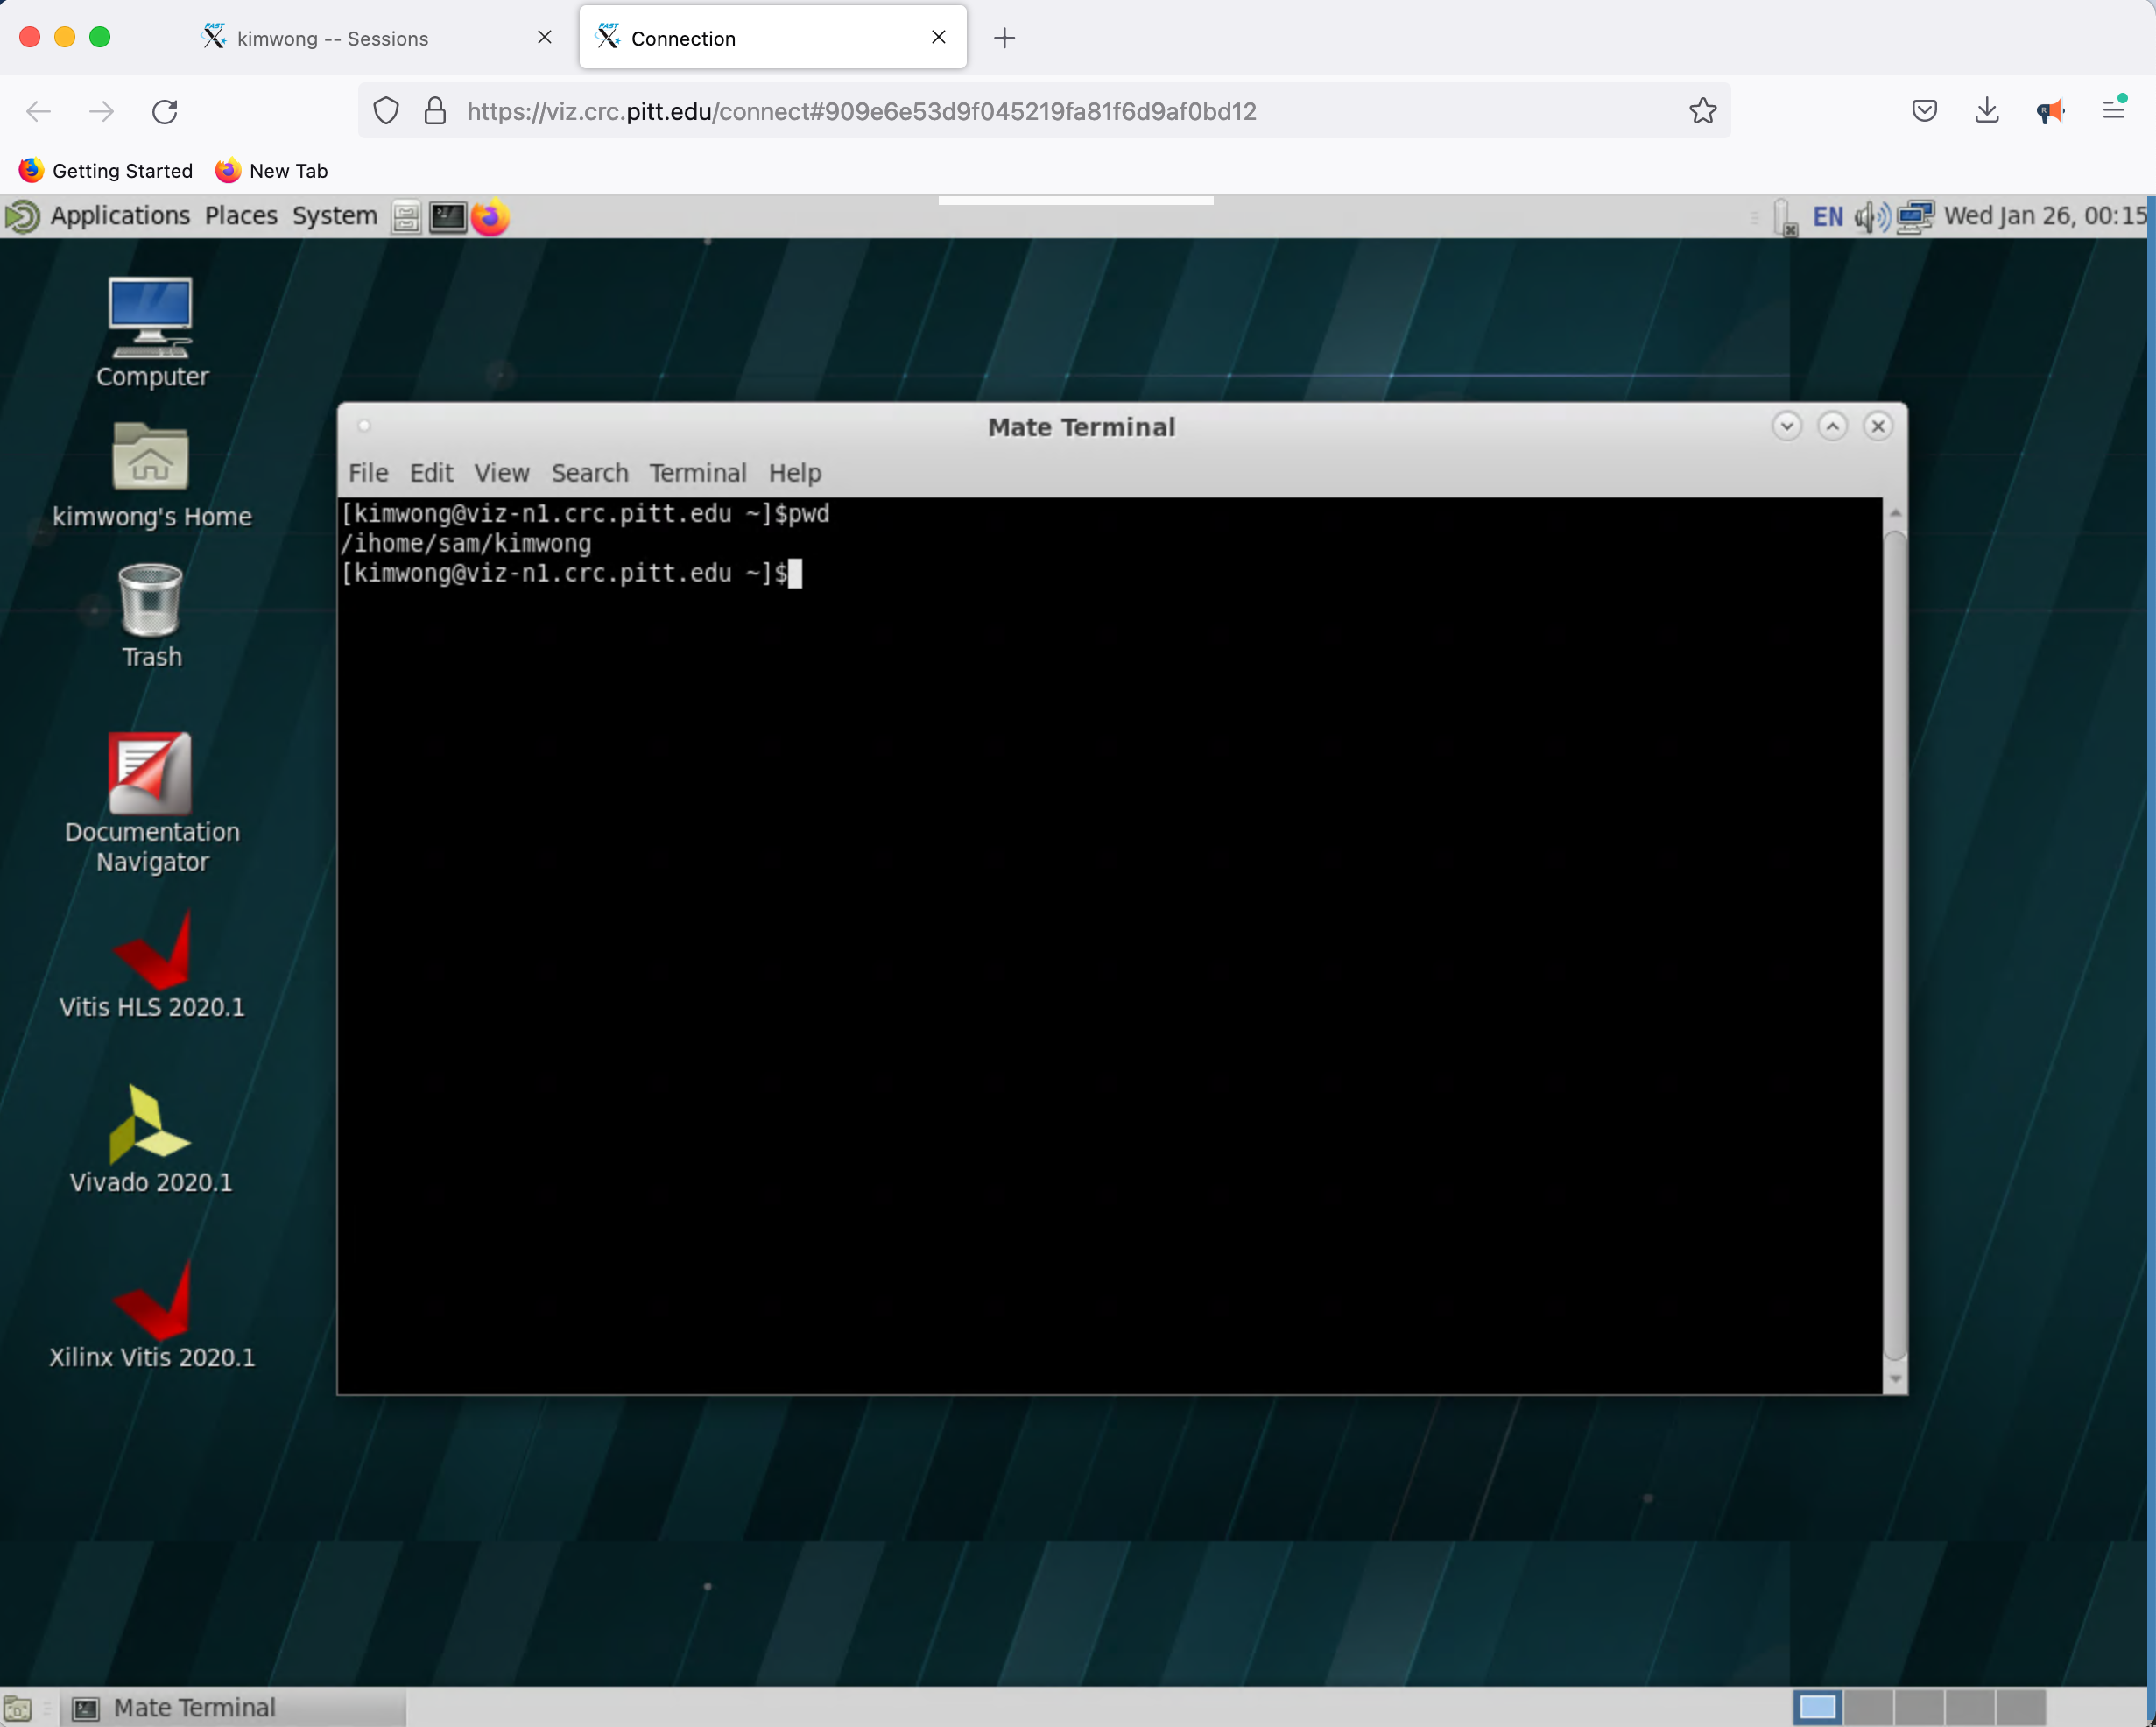
What is presented to you will be a Linux Desktop, with graphical capabilities, where you can interact with the rest of the CRC compute and storage resources
Open On Demand Web Portal
Similar to VIZ, the Open OnDemand web portal provides our users access to interactive compute resources. The full documentation for CRC's implementation features are described here.
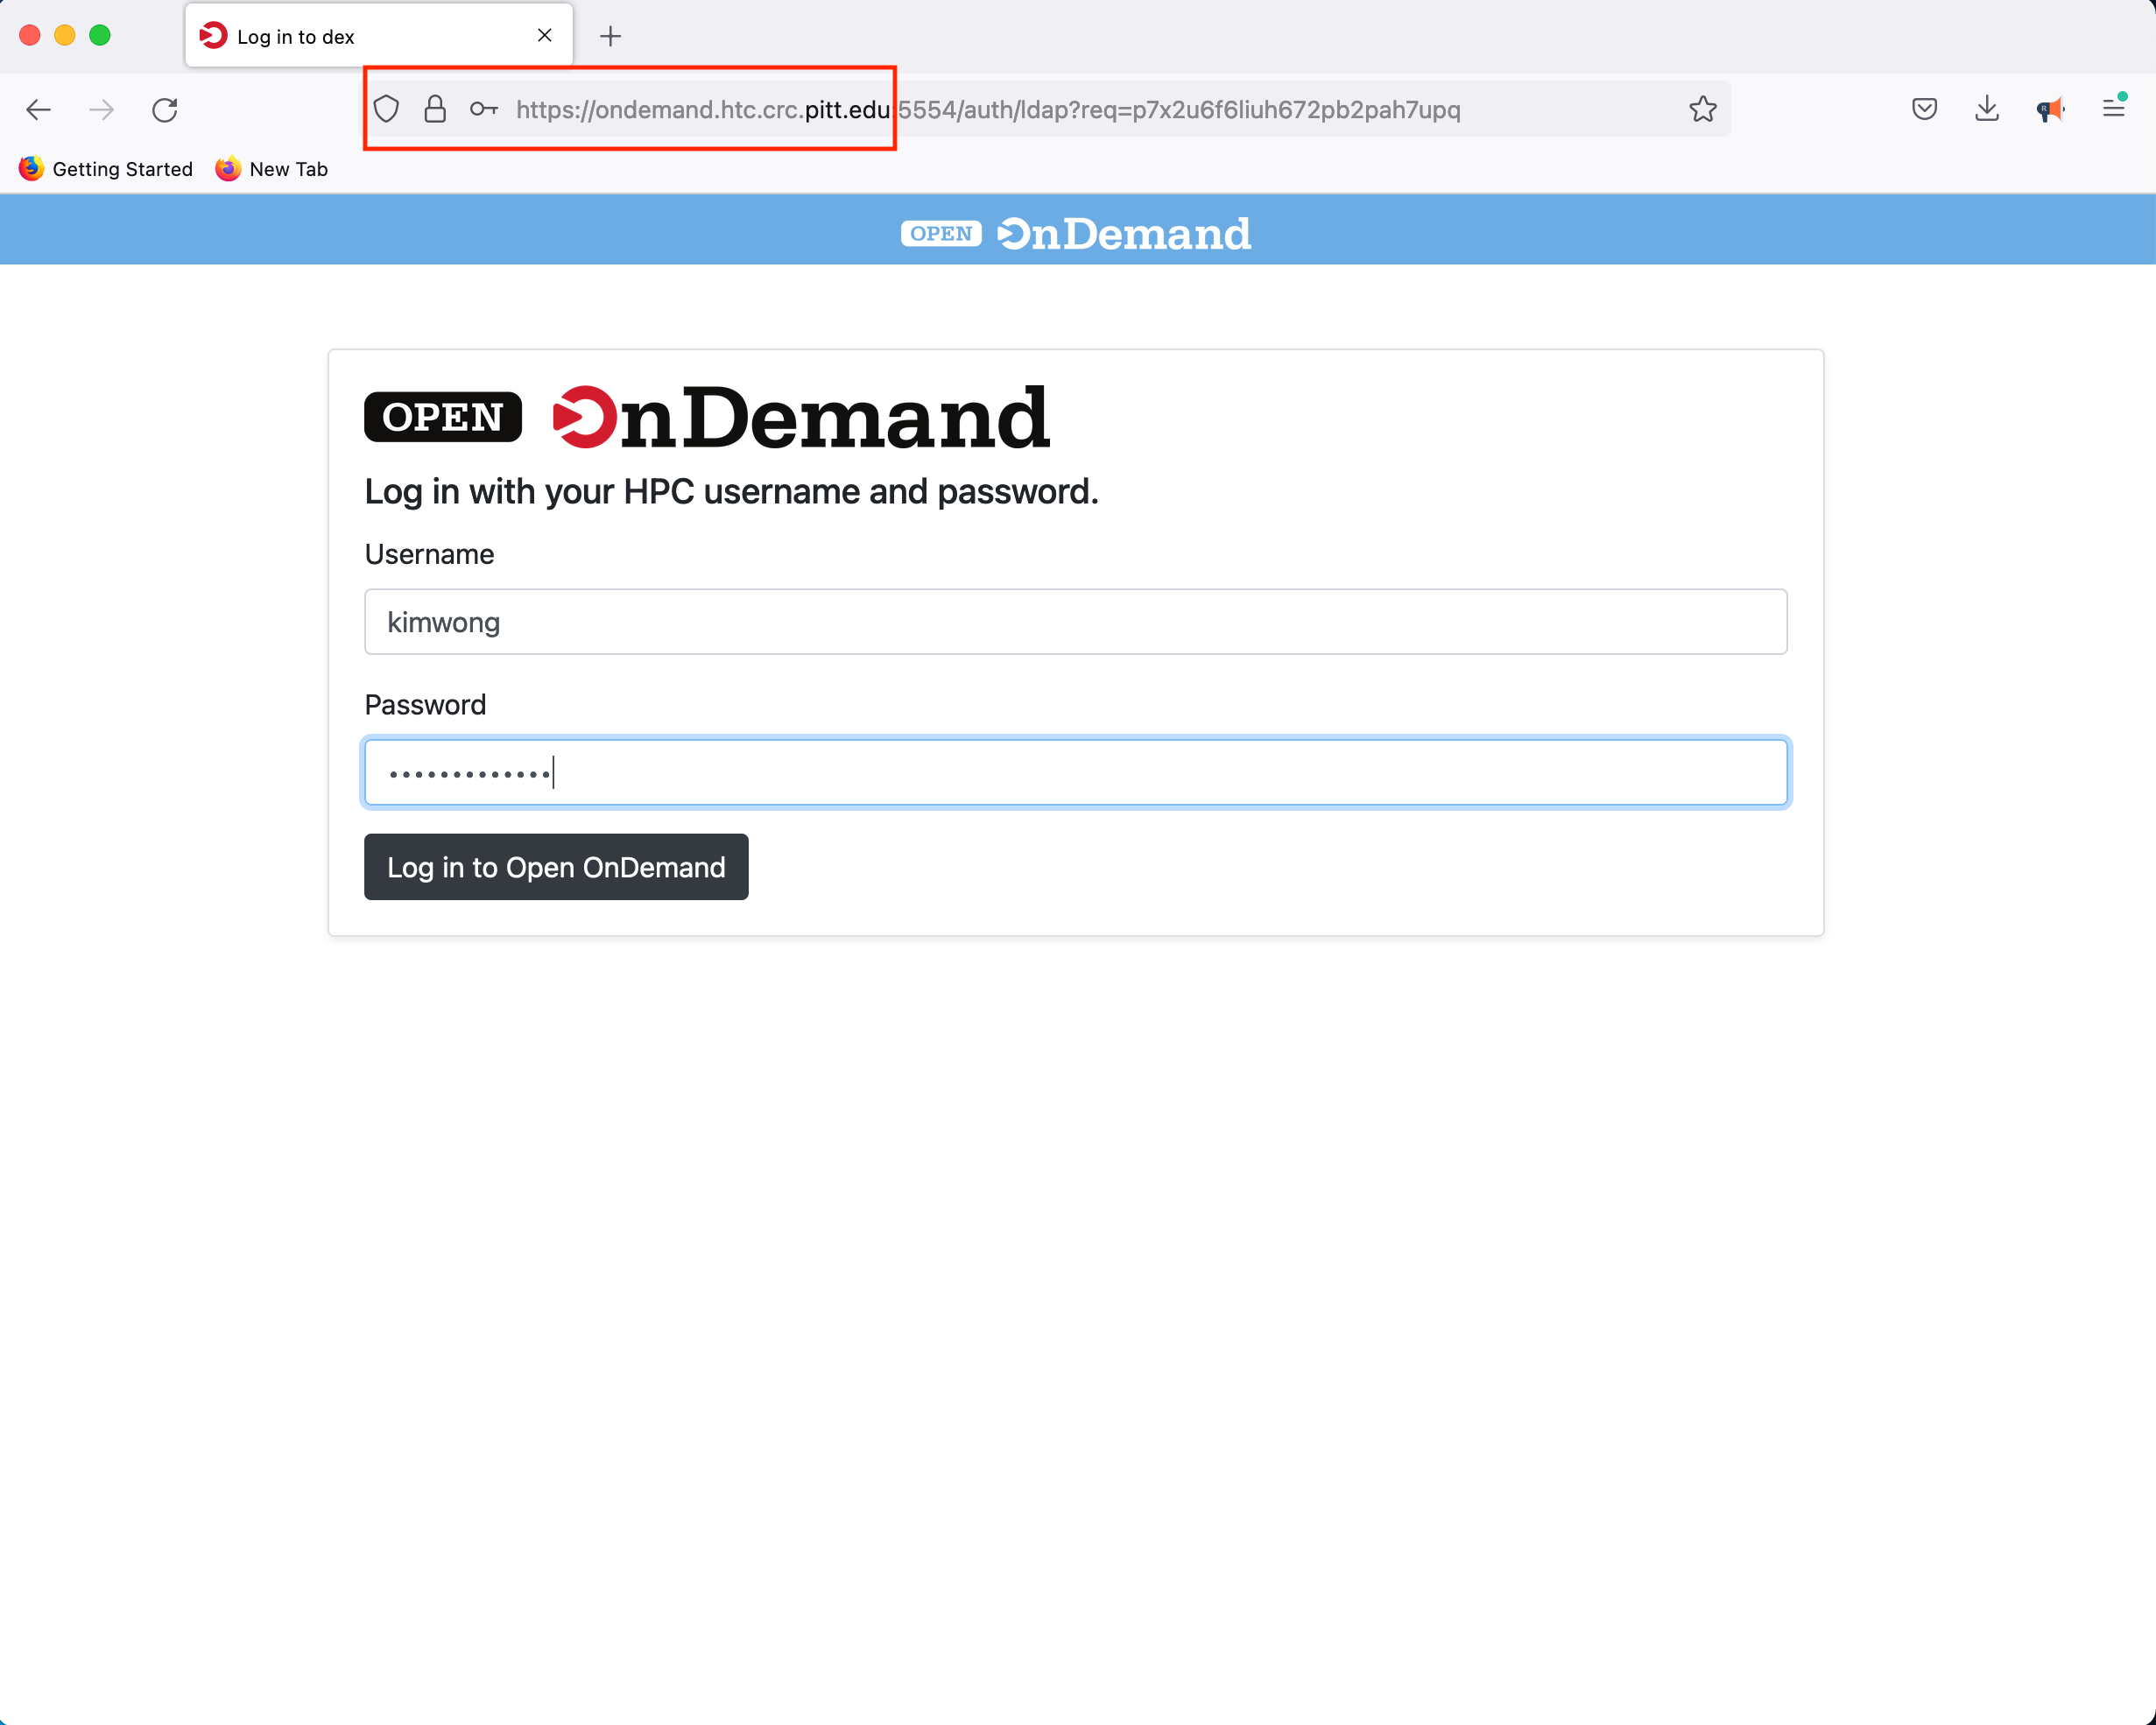
To get started, point your browser to OnDemand and authenticate using your Pitt credentials
Once you log in, you will be presented with a menu of options. For example, click on the Interactive Apps dropdown menu
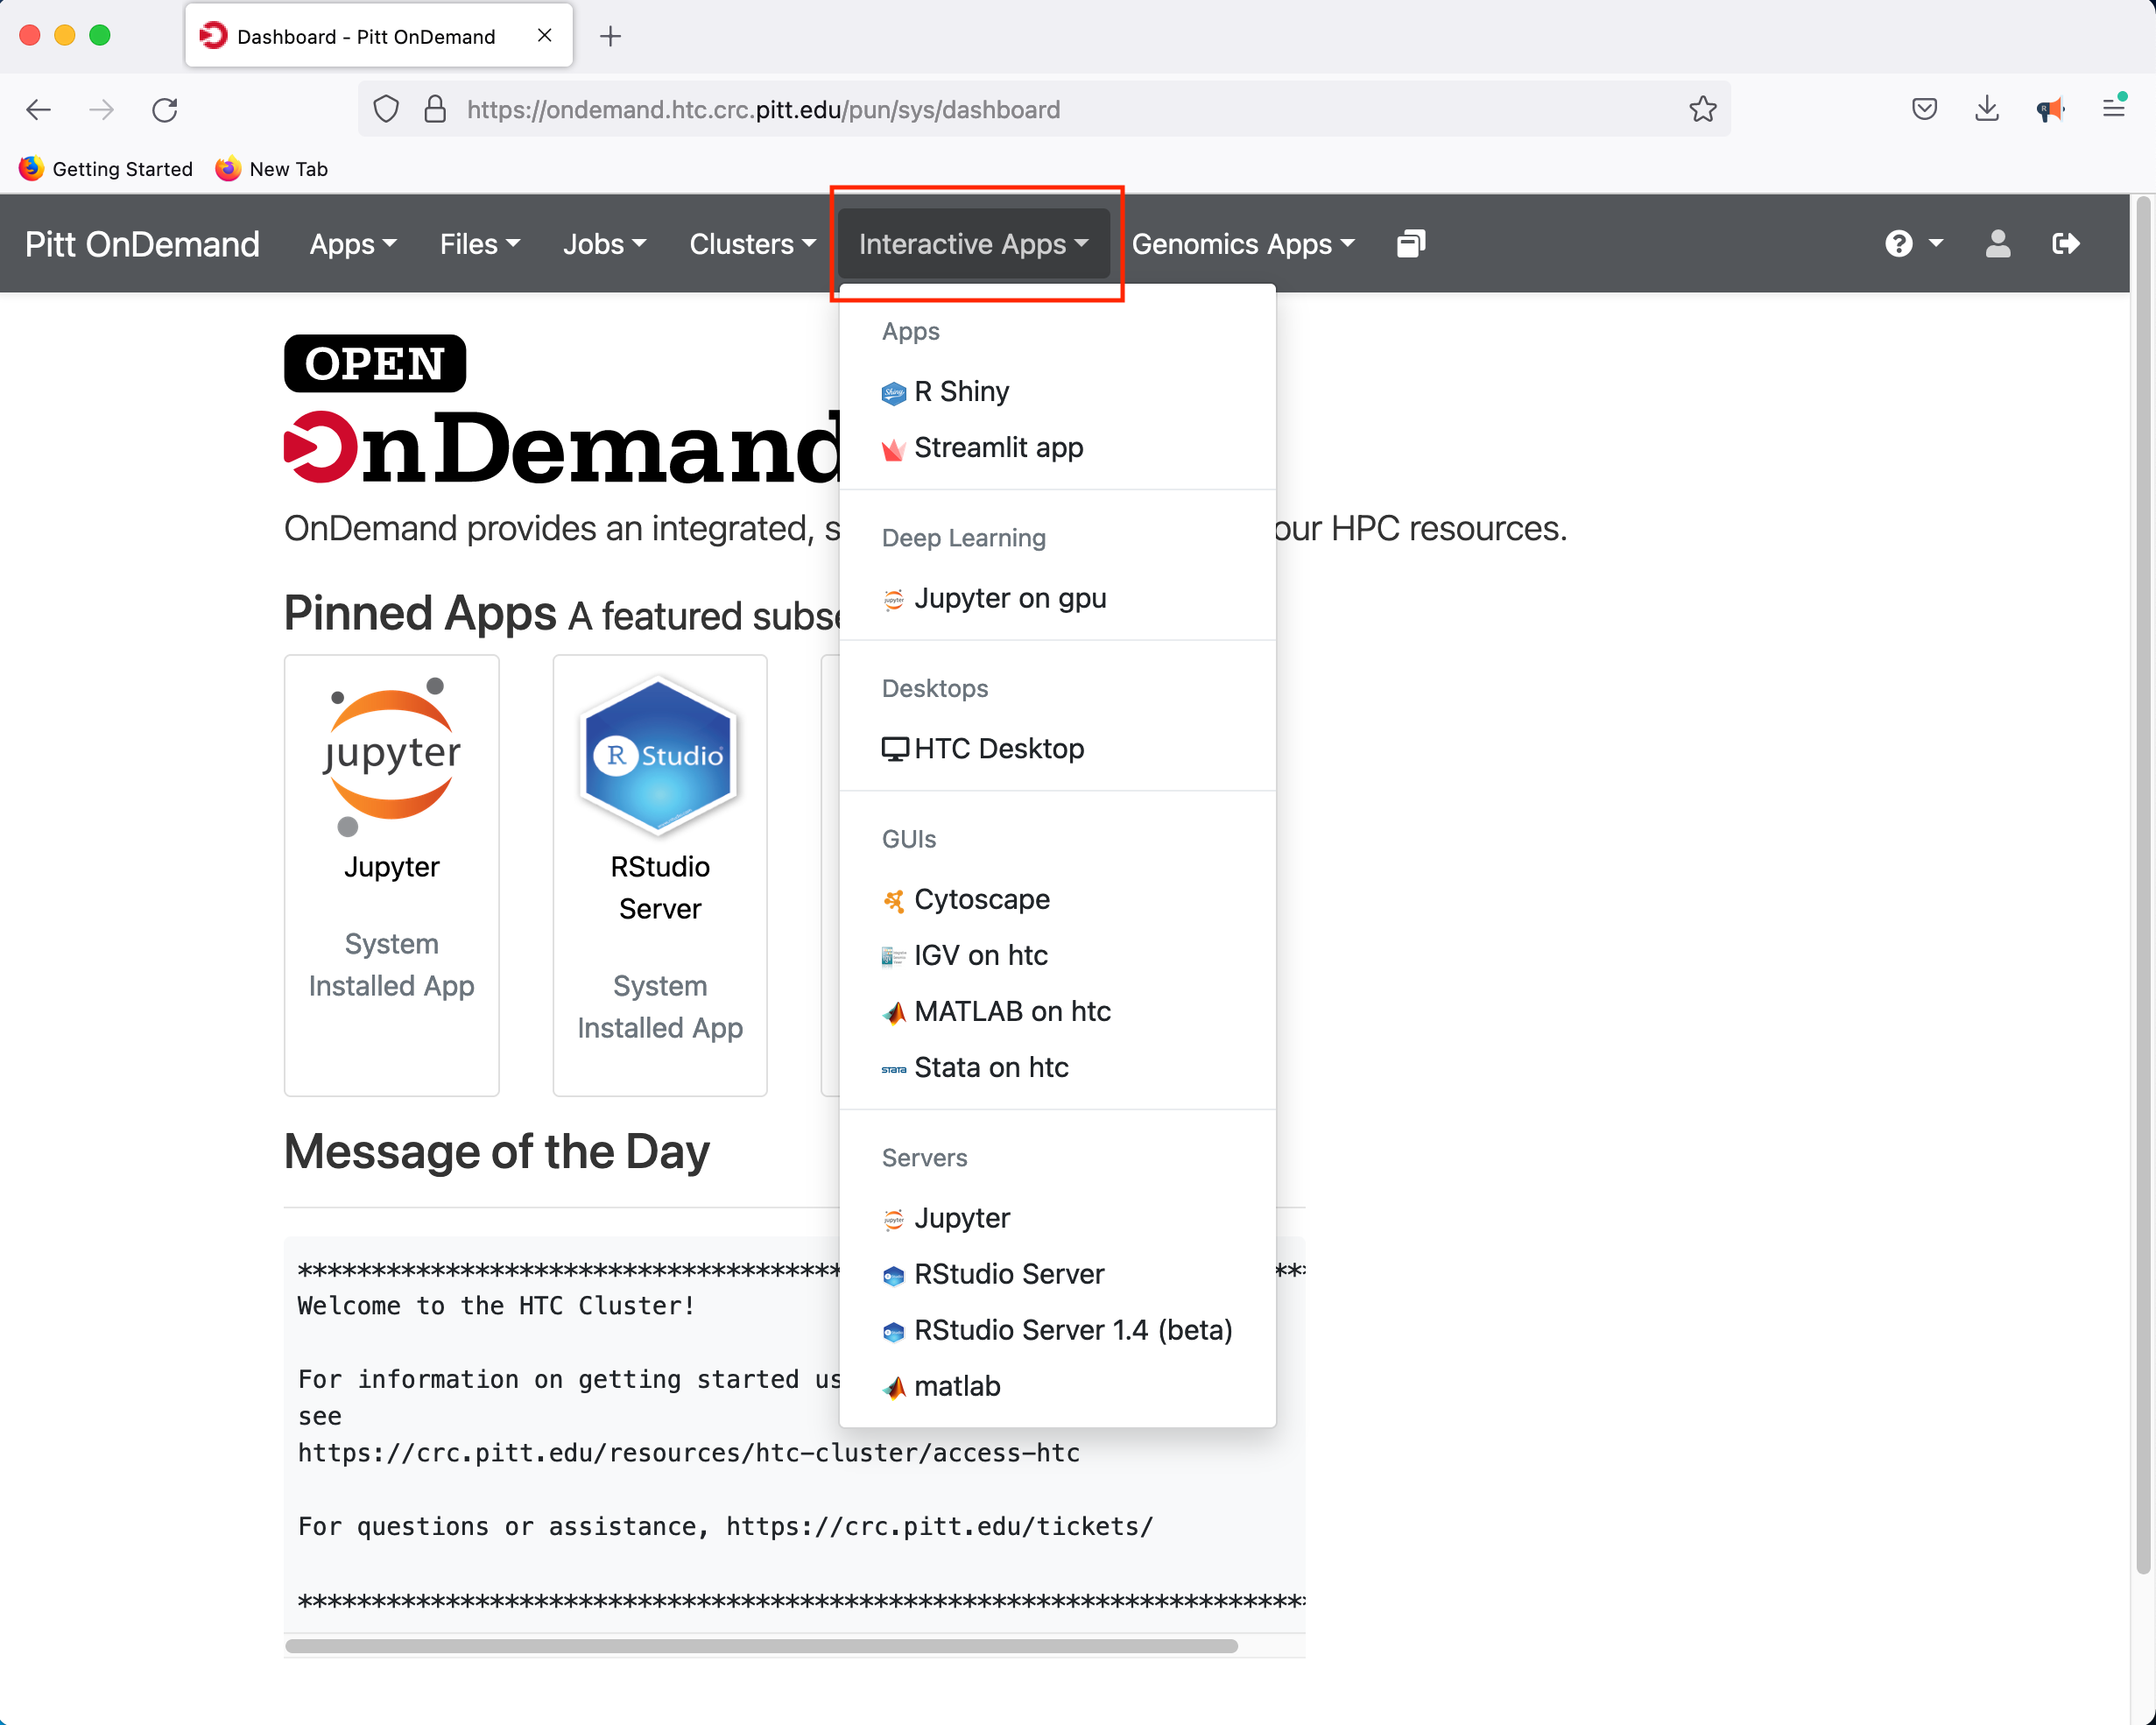
If you select the R Studio Server option, you will be presented with a panel where you can configure the resources to suit your needs
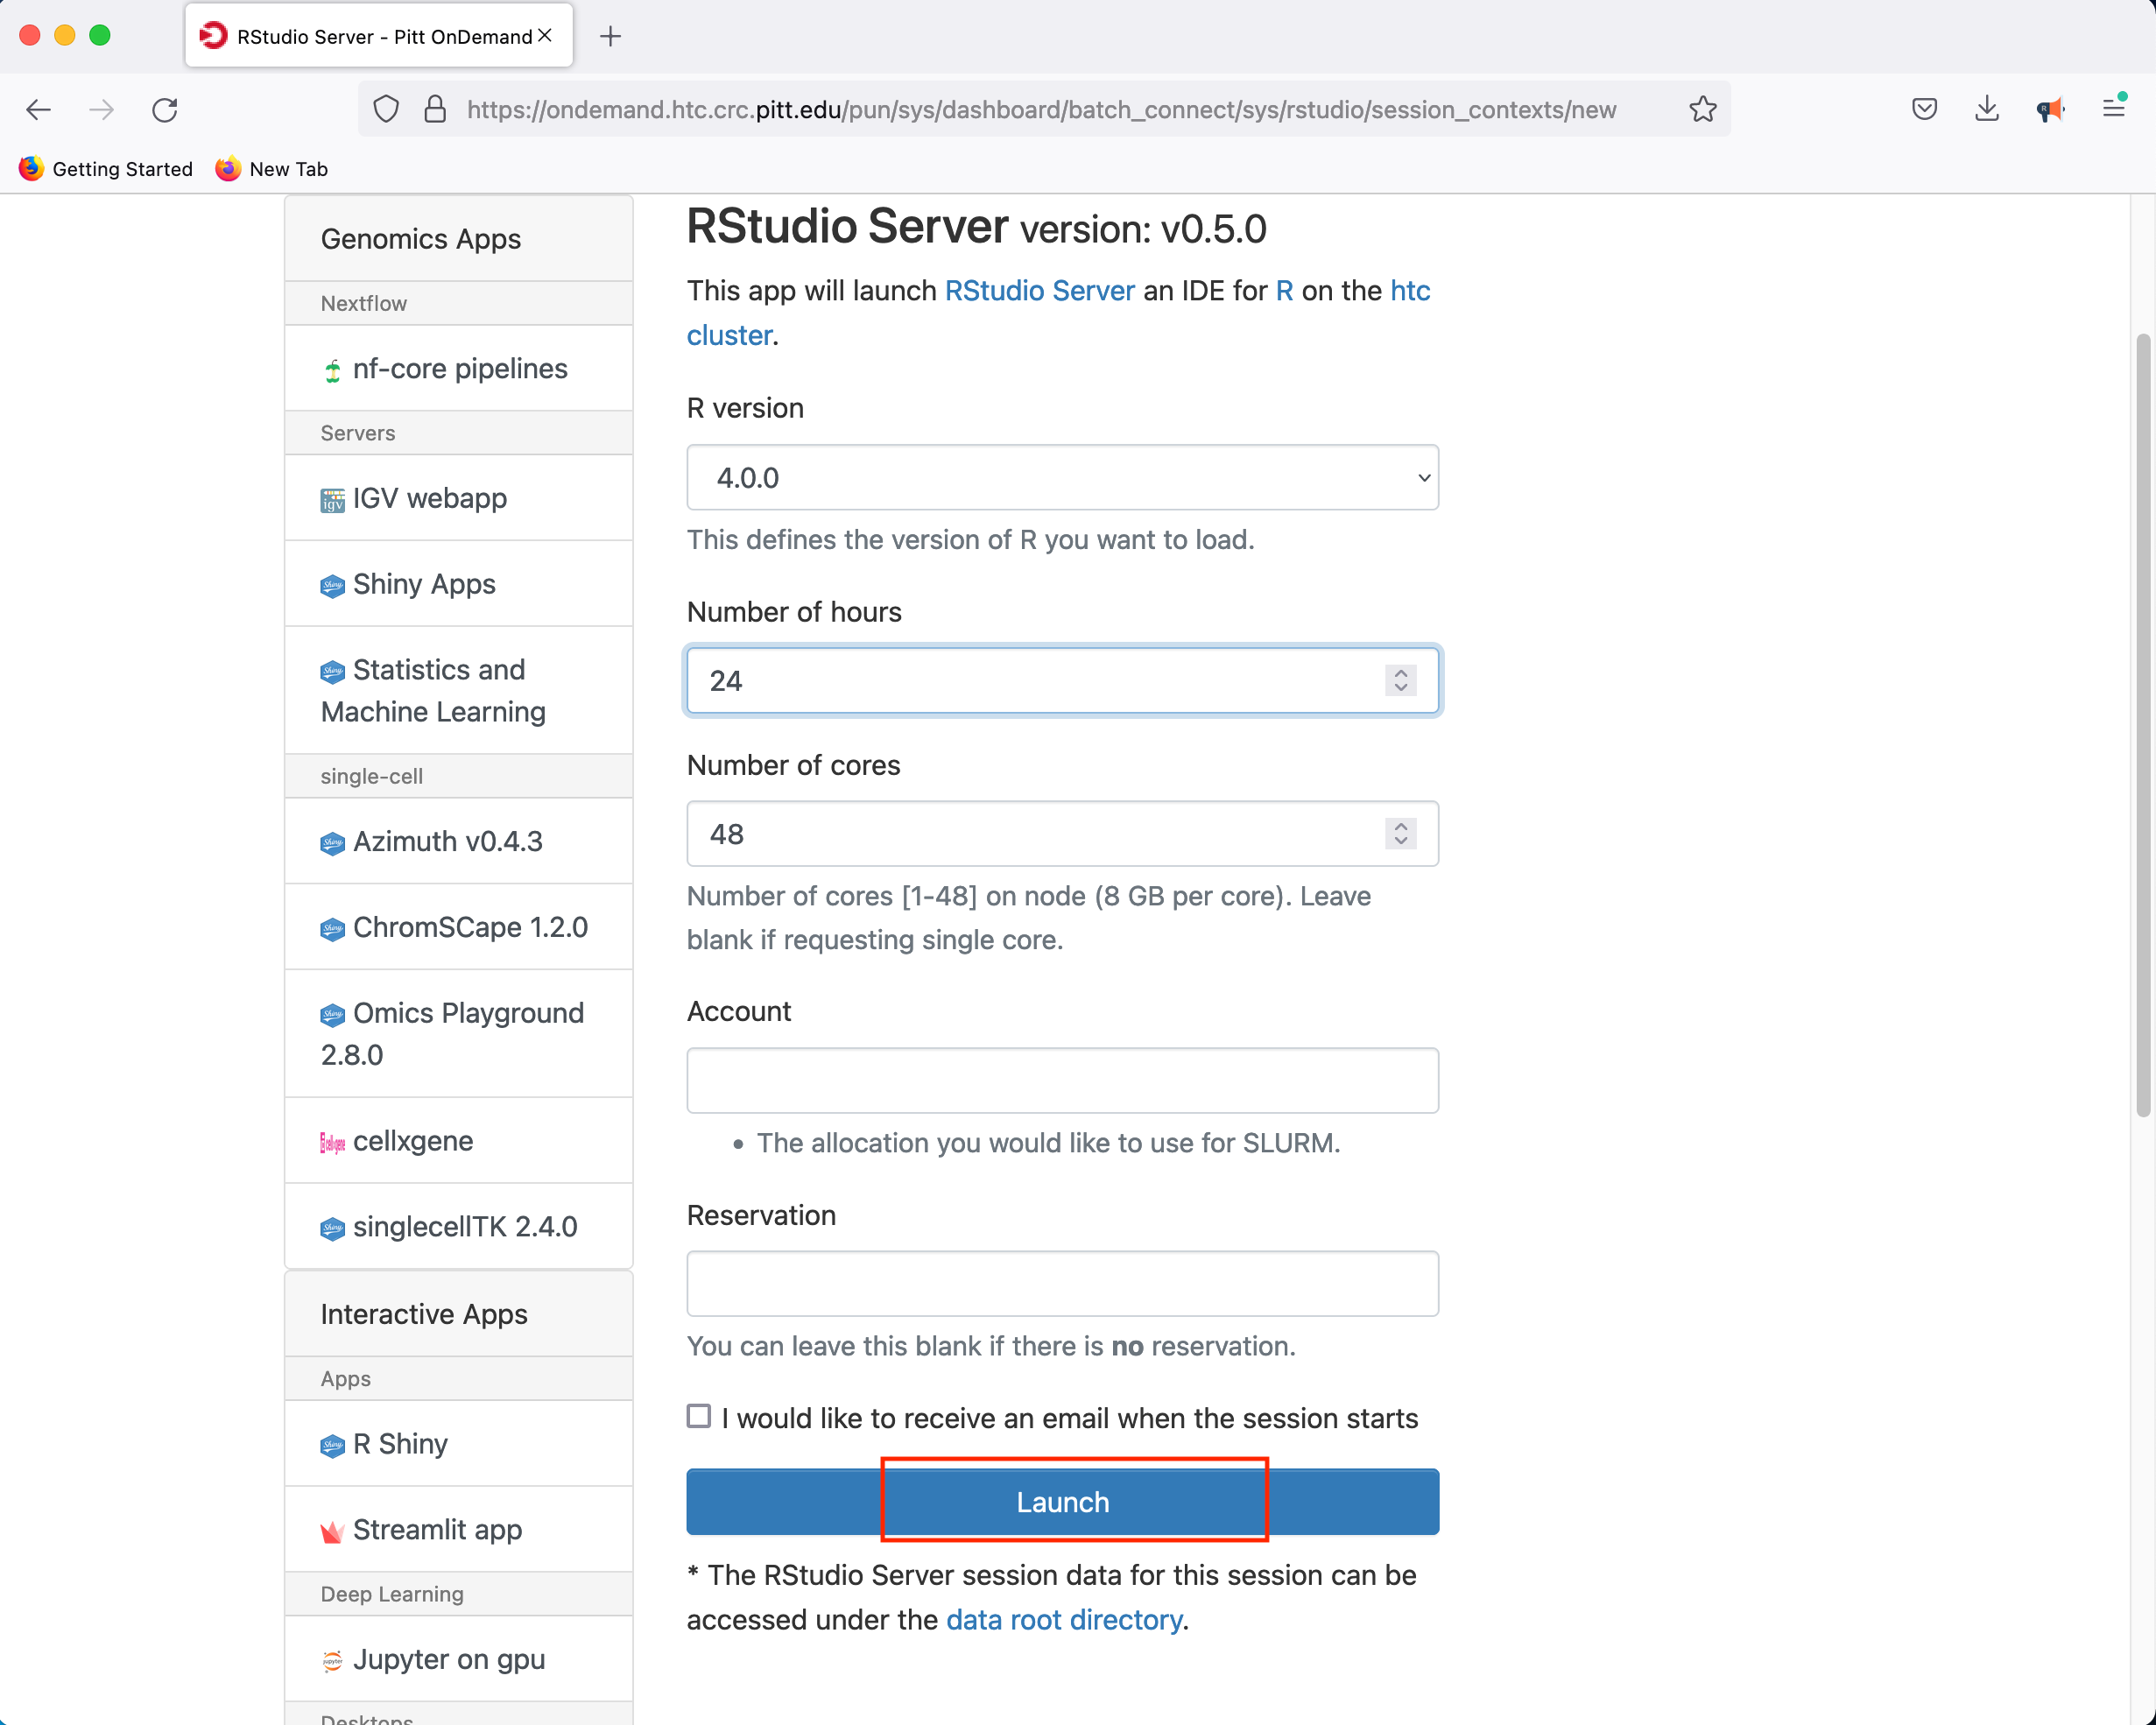
Clicking Launch will submit the resource request to the queue and will present a button to Connect to RStudio Server when the resources have been allocated.
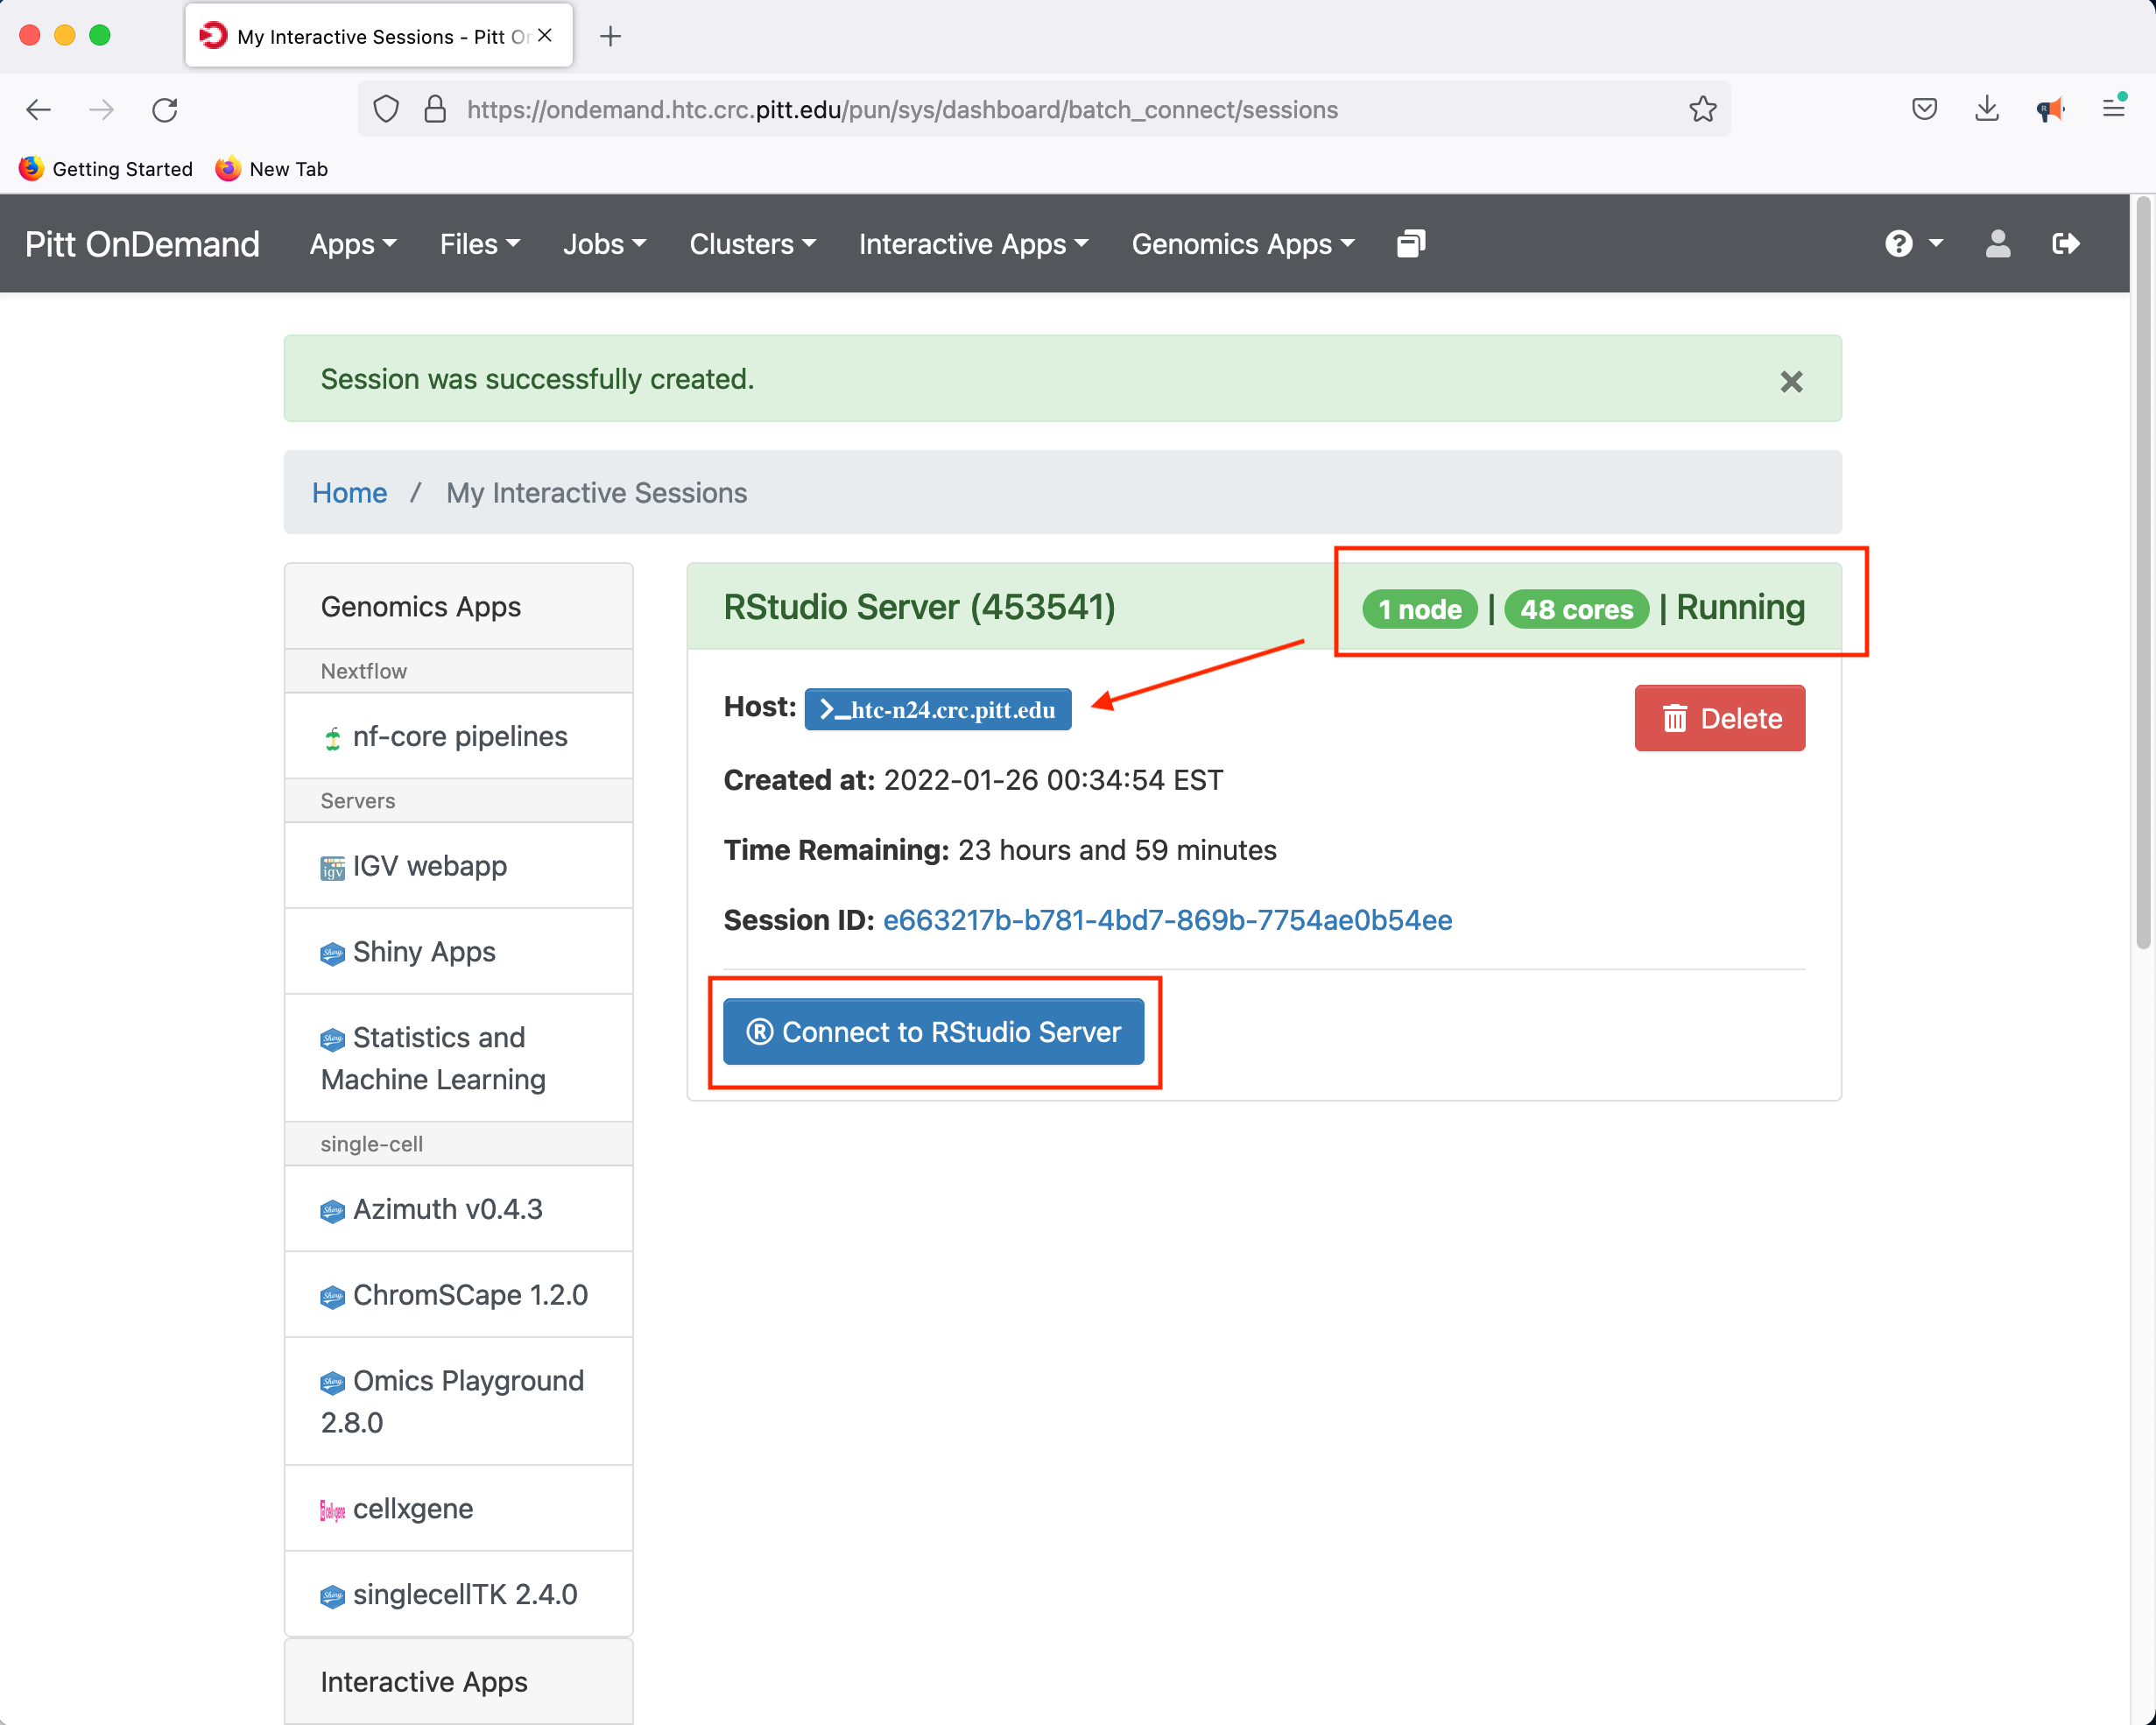
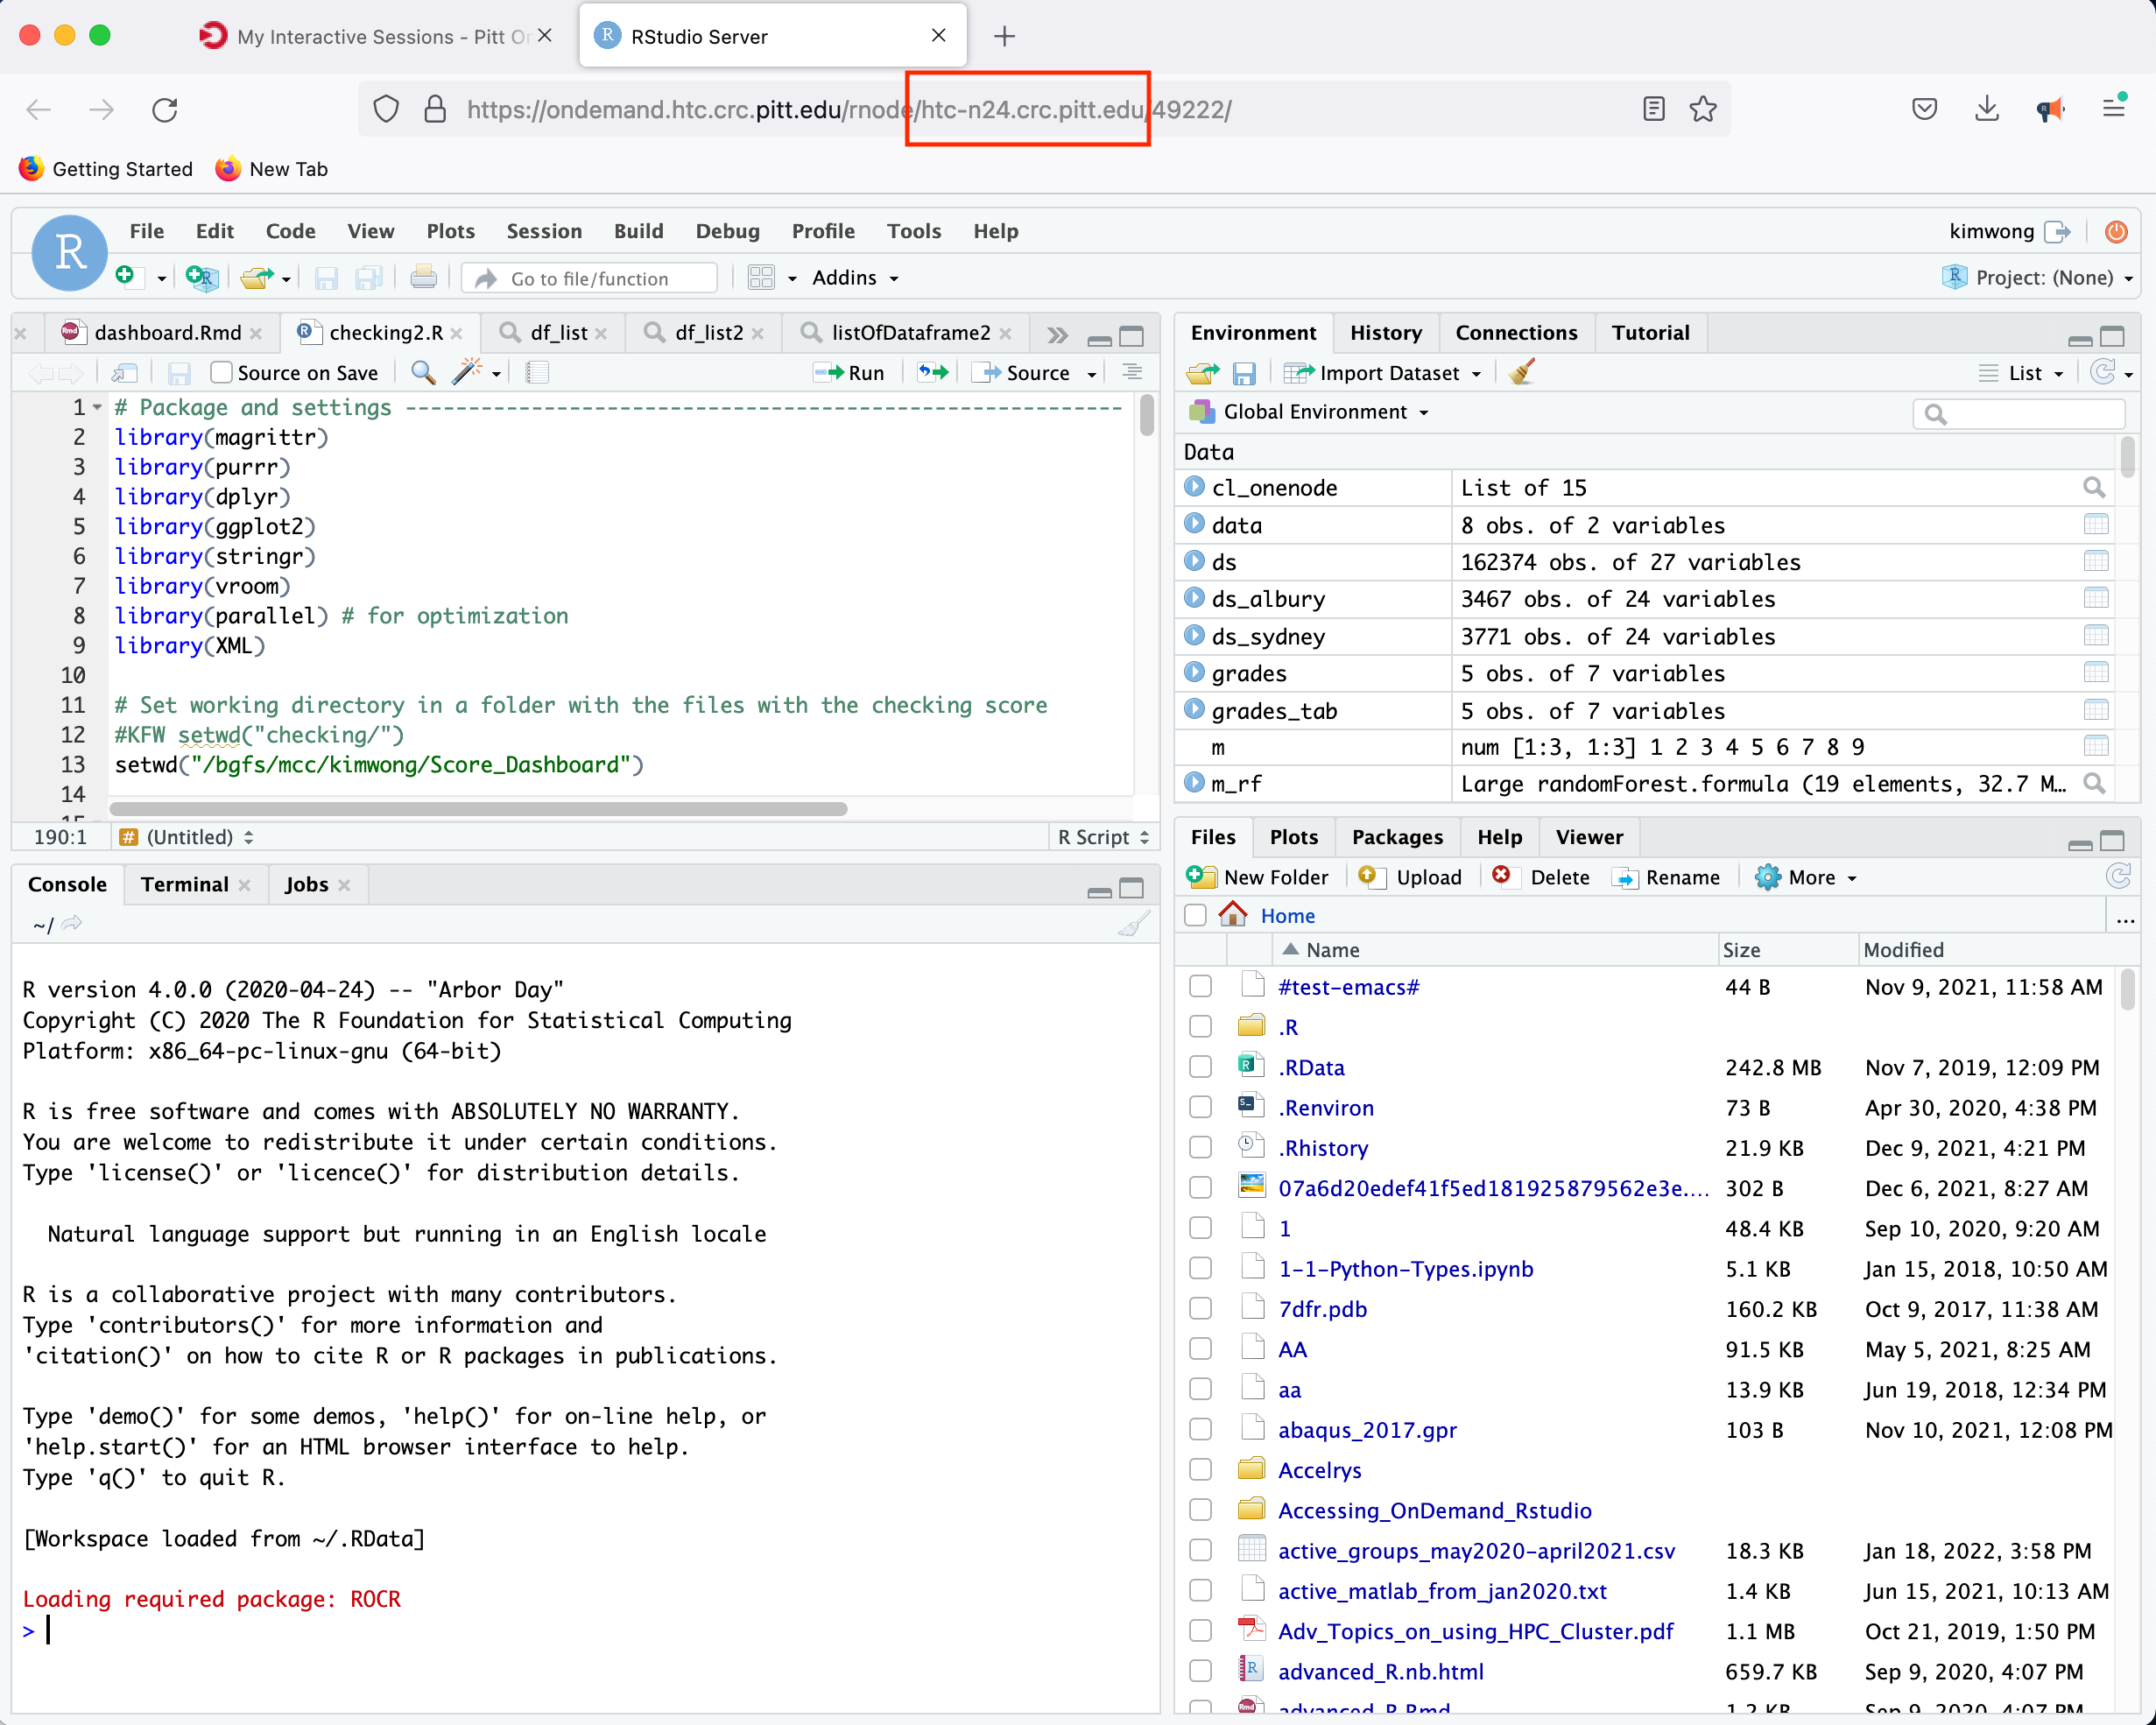
In this instance, the compute-node allocated to host the RStudio Server is htc-n24 with 48 cores for a period of 24 hours.
JupyterHub Web Portal
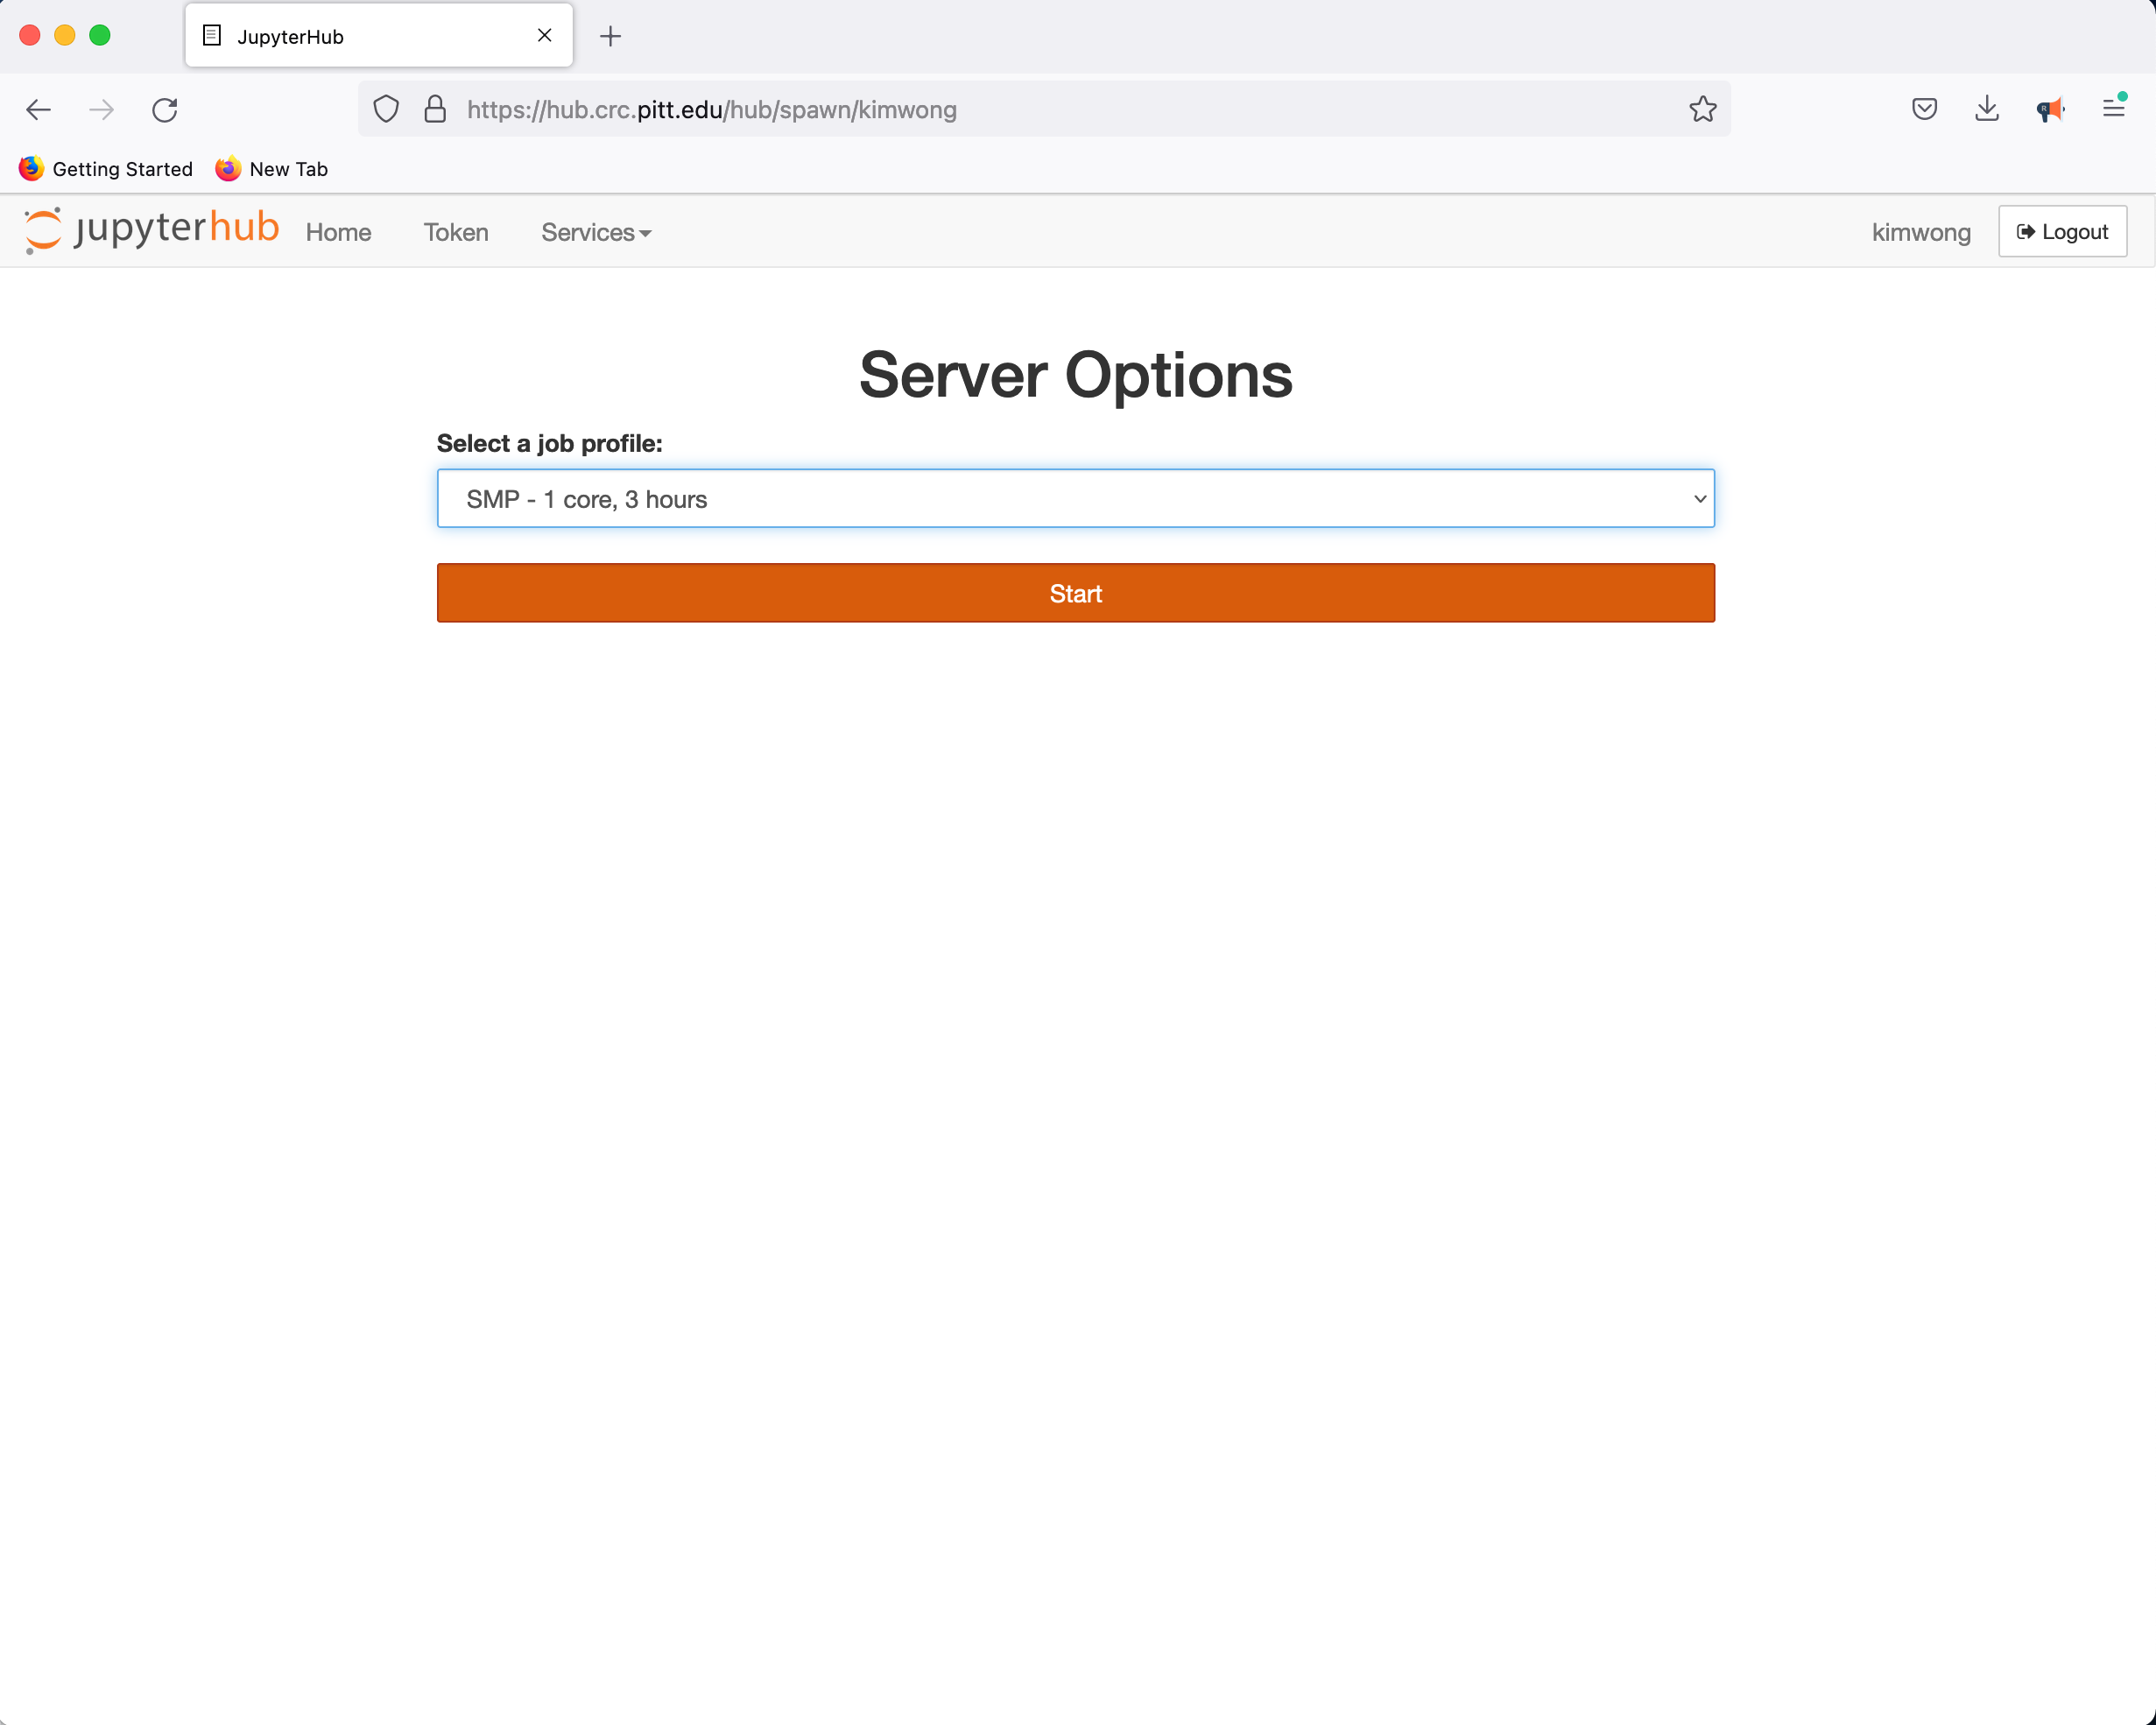
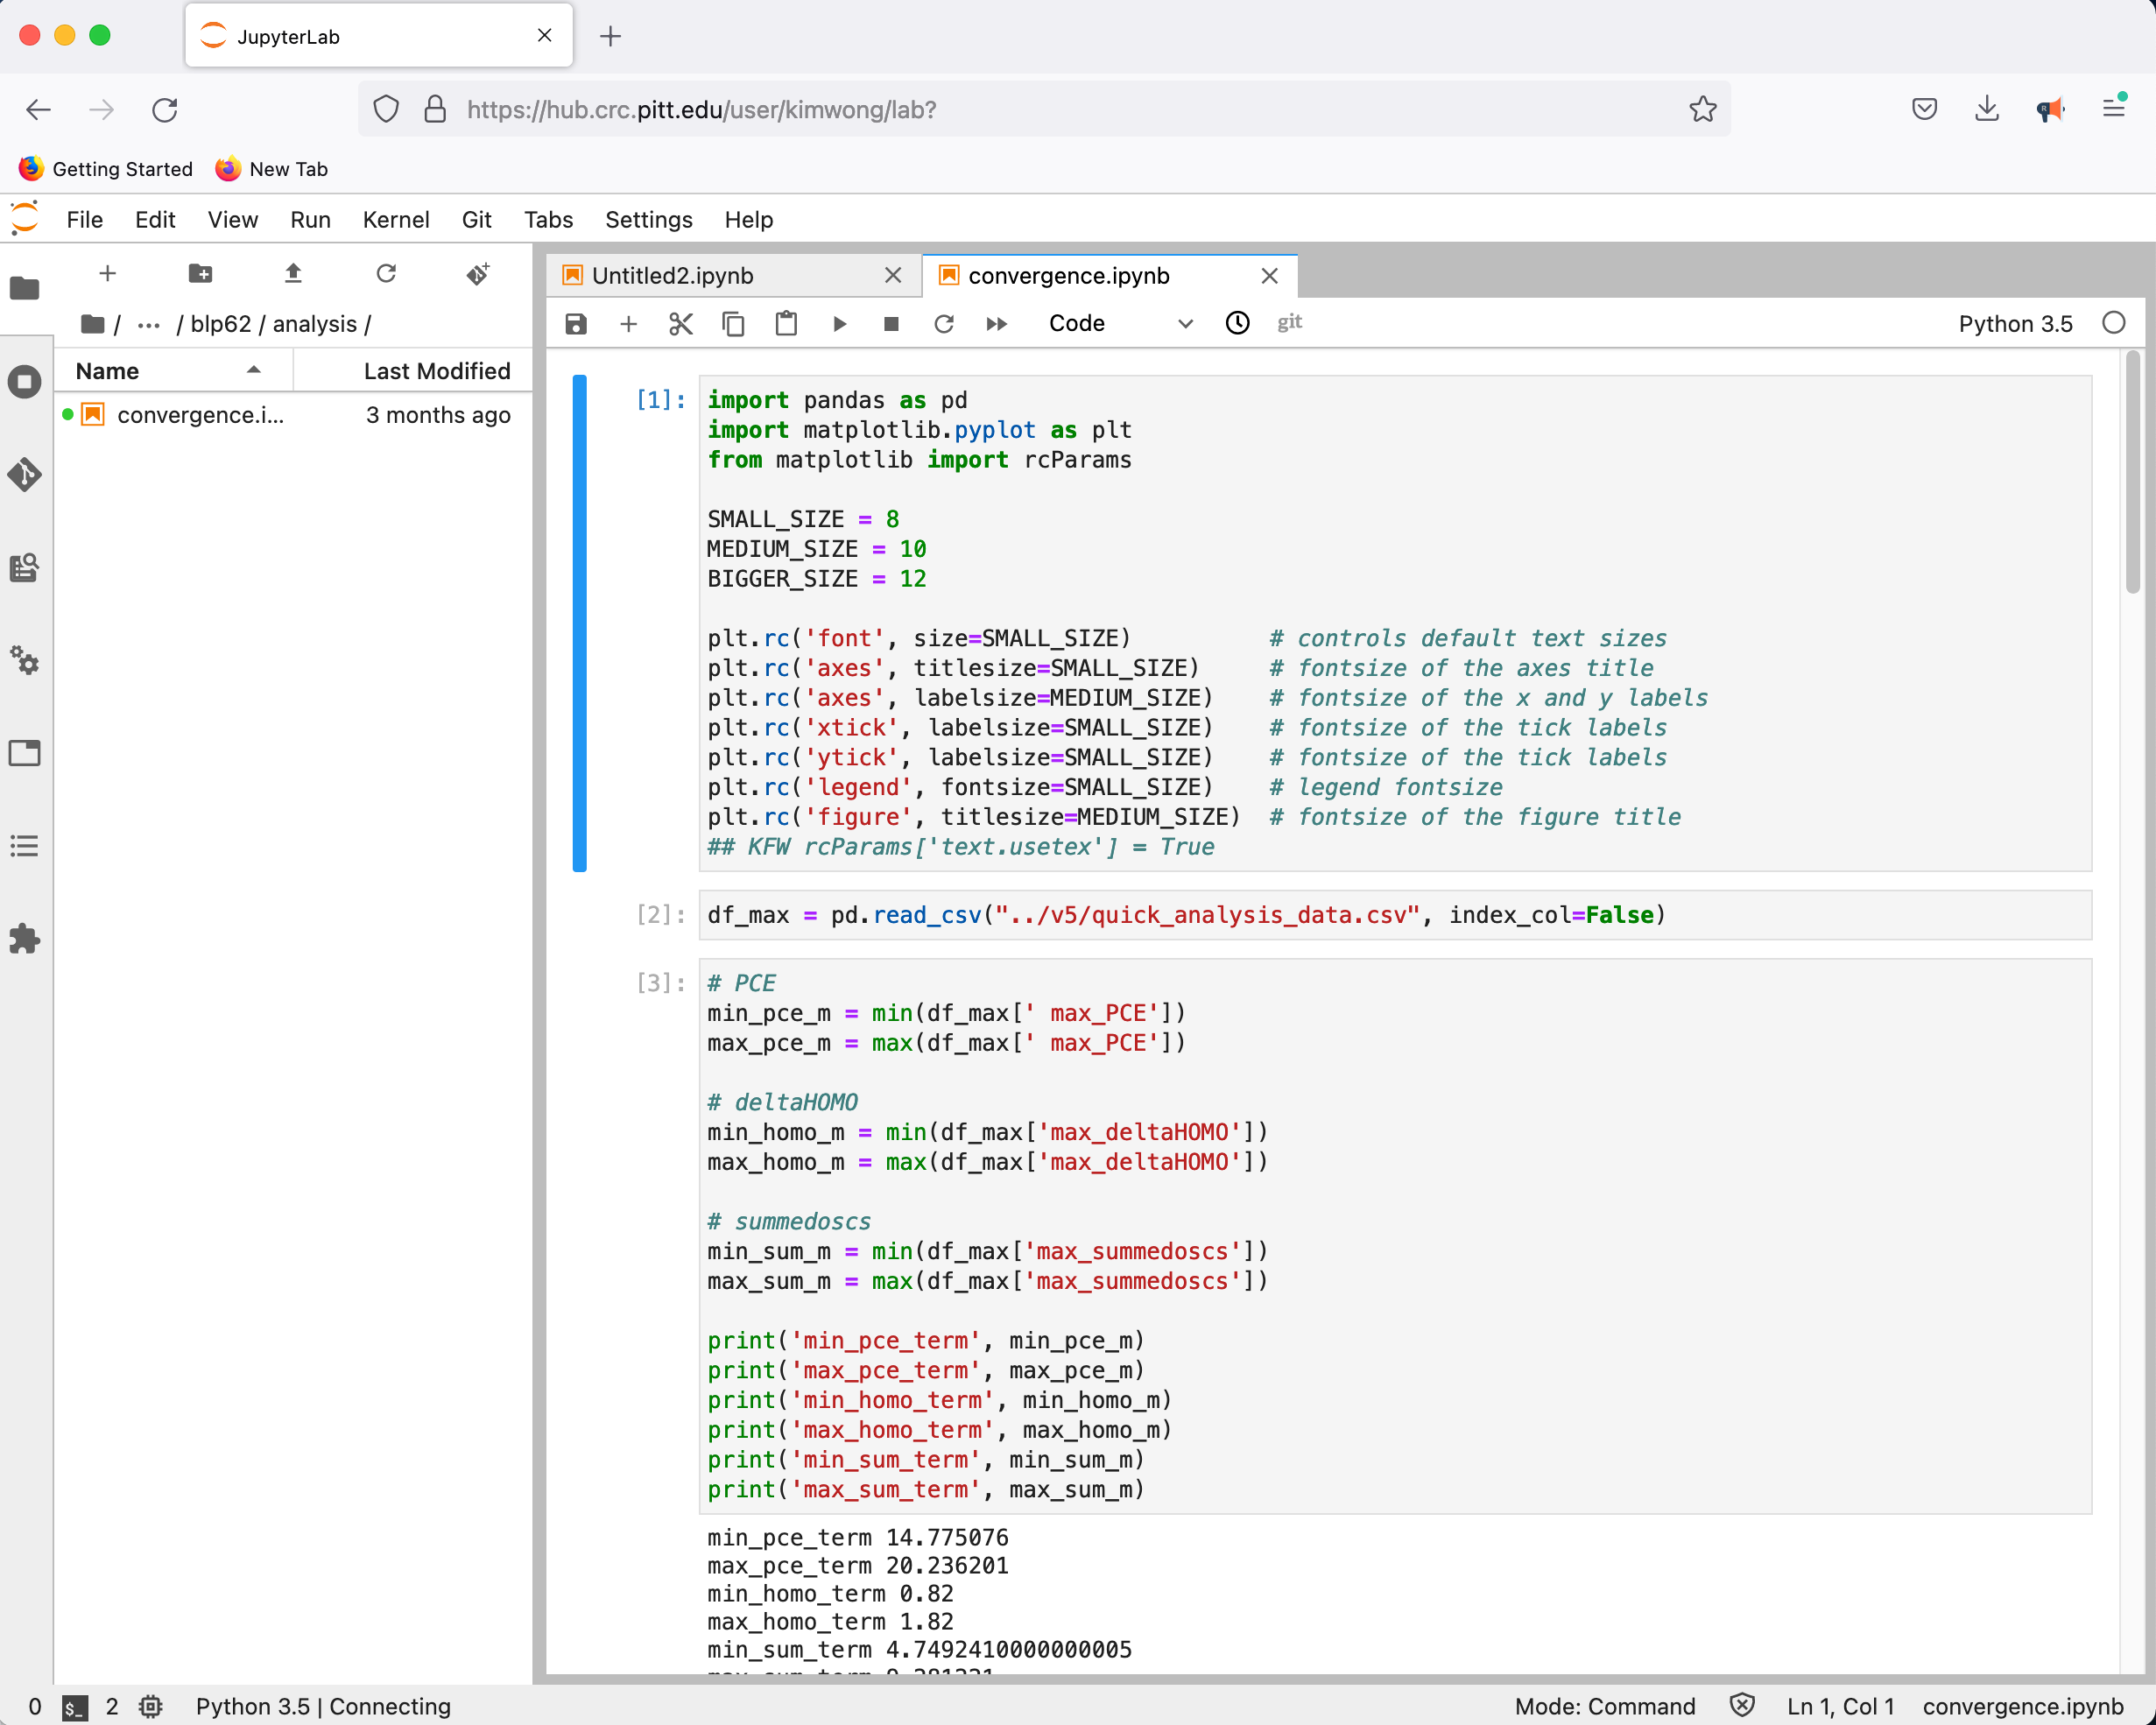
CRC provides a JupyterHub instance in support of teaching. Point your browser to hub.crc.pitt.edu and authenticate using your Pitt credentials when presented with the Pitt Passport page. Clicking on Start My Server provides a panel for requesting access to CPUs and GPUs
followed by the familiar Python environment
- Website: https://crc.pitt.edu
- Getting Started: https://crc.pitt.edu/getting-started/requesting-new-account
- User Manual: https://crc-pages.pitt.edu/user-manual/
The best way to get help on a specific issue is to submit a help ticket. You should log in to the CRC website using your Pitt credentials first.
Please return to the Pitt CRC Codelabs dashboard and find the "Running Software on the Clusters" codelab, or use this link to continue